
How to create an issue
You have a bug to log before you forget it. You hit Create, and now there are four work types, a Details panel, an epic picker, and a button called "Draft with AI" staring back at you. You wanted to write down one sentence. Instead you are reading a form.
Here is the thing: once you know which parts of that dialog matter and which you can skip, creating an issue in Utter takes about ten seconds. This guide covers the whole path. Three ways to open the New issue dialog, how to pick the right type without agonizing over it, how to fill the fields so the issue is actually workable later, and the honest limits that trip people up (subtasks, empty columns, viewer roles). By the end you can file a clean issue fast and know why every field is there.
I'll use the demo project the whole way through: a project keyed WEB, with a board whose columns run Backlog, To Do, In Progress, In Review, Done. Concrete beats abstract.
What an issue is, and why the type is not just a label
An issue is the smallest unit of trackable work in Utter. A feature, a fix, a chore, a quarter-long initiative: each one becomes an issue with a stable key like WEB-42 that stays put even if you rename the project later.
Every issue has a type. Epic, story, task, or bug in the dialog (subtask is a special case, more on that in a minute). The type is not a color you pick for flavor. It changes real behavior:
- It pre-fills a different Markdown description template, so a bug opens with a "steps to reproduce" scaffold and an epic opens with a "goal and scope" one.
- It drives how work rolls up, since stories, tasks, and bugs can hang off an epic.
- It feeds your reports, so an "open bugs" count actually counts bugs.
Hold onto one fact up front, because it saves confusion later. The New issue dialog lets you create four types, not five. Task, Story, Bug, Epic. Subtask is deliberately absent from that selector, and there is a good reason we will get to. For now: subtasks are made somewhere else.
How to create an issue: three ways to open the dialog
There are three ways to open the New issue dialog, and each one wins in a different situation.
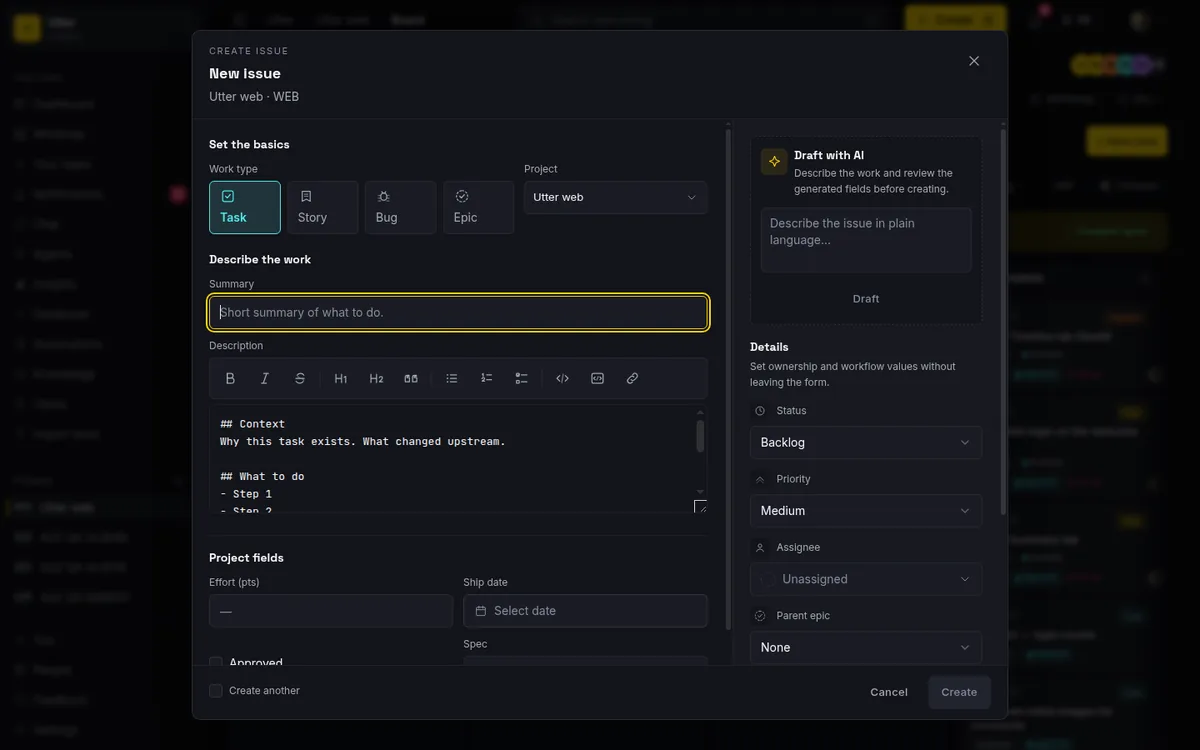
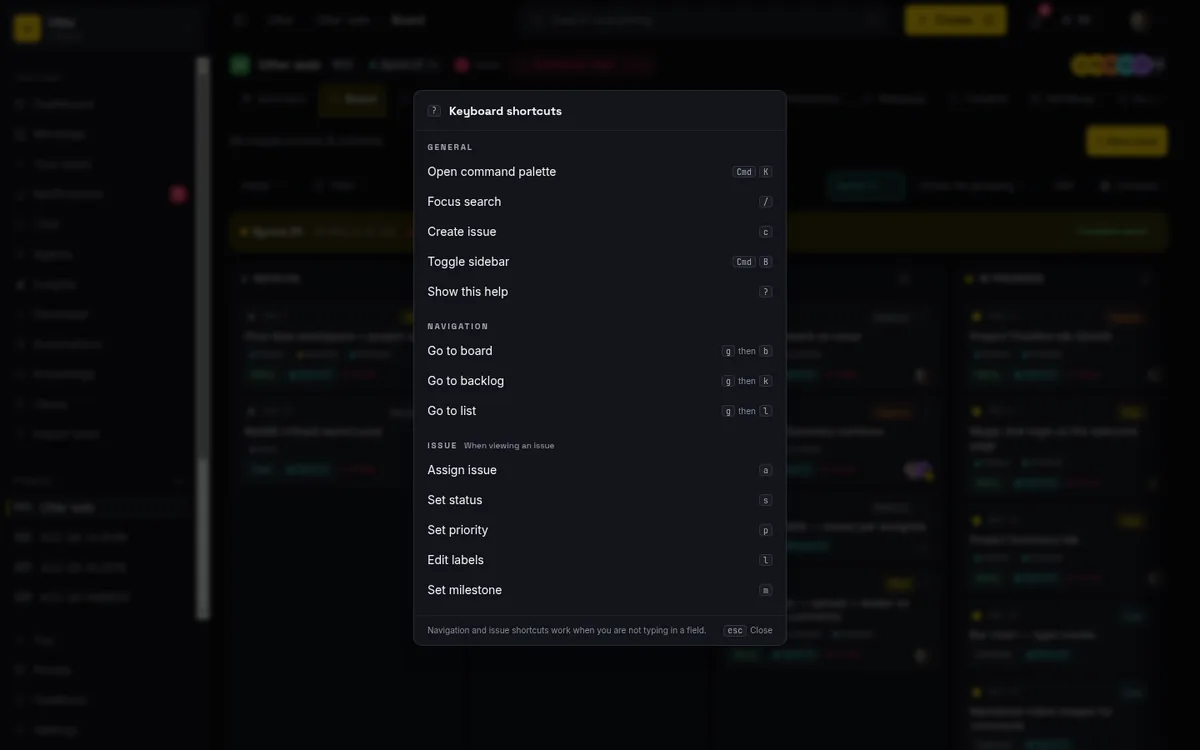
The fastest is the keyboard. Press c anywhere inside a workspace and the dialog opens. This is the one to build muscle memory for. It fires from the board, the backlog, a report, wherever you happen to be. It is also polite about context: it is ignored while you are typing in an input, textarea, select, or any editable area, and ignored while you hold Cmd, Ctrl, or Alt. So you will not fire it mid-sentence while writing a comment. Tap c on an empty patch of the app and go.
Second is the yellow Create button in the topbar. Same result as c, and on desktop it shows the c hint right next to it so you pick up the shortcut without trying. Reach for the button when your hand is already on the mouse, or when you are new and do not trust yourself to remember the key.
Third, on a board or list view, there is a "+ New task" button. This one can pre-scope the new issue to a specific place, which matters for board columns. We will come back to it.
One permission note before you get comfortable. Creating an issue requires the issue.create permission, which owners, admins, and members have. Viewers do not. As a viewer you will not even see a Create button, and c does nothing. That is the role working as designed, not a bug (there is a FAQ on it below).
When the dialog opens, read the layout once and you will never hunt again. It is two panels. The left, under "Set the basics," is where you describe the work: work type, summary, description. The right, the "Details" panel, is where you set metadata: status, priority, assignee, parent epic, labels. Basics left, details right. That split holds for the entire dialog.
Picking a work type: Task, Story, Bug, or Epic
At the top of the left panel is a "Work type" group of tiles. Task is selected by default, and honestly the default is usually right. But here is a practical rule for each so you choose on purpose instead of guessing.
flowchart TD
    A[New work to file] --> B{Something broken?}
    B -->|yes| BUG[Bug]
    B -->|no| C{Framed from the user side?}
    C -->|yes| STORY[Story]
    C -->|no| D{Umbrella other issues roll up to?}
    D -->|yes| EPIC[Epic]
    D -->|no| TASK[Task]
Task is a discrete, concrete piece of work. "Add a rate limit to the login endpoint." "Update the pricing copy." If one person does the thing and then the thing is done, it is a task. This is your workhorse and your safe default.
Story is user-facing behavior, framed from the user's side. "A signed-out visitor can preview a shared board." Product and design tend to think in stories, so if the work is defined by what a user can now do, reach for Story.
Bug is something broken. Not a new feature, not a nice-to-have, an actual defect or regression. "Timeline + Summary tab loads blank on first paint." Filing it as a Bug instead of a Task is what keeps your triage views and bug counts honest, so resist the urge to log everything as a task.
Epic is the big container. You do not do an epic directly; it is the umbrella other issues roll up to. "Q3 billing revamp." "Mobile onboarding." Create the epic, then attach the stories, tasks, and bugs beneath it. Epics let you see progress across a whole initiative instead of a scatter of tickets.
Each tile carries its type icon and lights up in the brand color when active. Selecting a tile also swaps the Description field to that type's template. So if you pick Bug and then wonder why the description suddenly grew a "steps to reproduce" section, that is the template doing its job.
Notice what is missing: Subtask. No fifth tile, on purpose. A subtask only makes sense underneath an existing parent, so it has no business in a dialog you can open from nowhere in particular. You make subtasks from the parent, which is coming up.
Writing a summary and description someone can act on
The Summary field is the only required field, and it is autofocused the moment the dialog opens, so you can start typing without clicking anything. It caps at 255 characters. That is plenty; if you are bumping the ceiling, your "summary" is trying to be a description.
Write a specific title. This is the highest-leverage thing you can do for future-you and your teammates. "Timeline + Summary tab loads blank on first paint" tells anyone scanning the backlog exactly what is wrong and where. "timeline bug" tells them nothing, and guarantees someone reopens the ticket just to ask what you meant. A good summary answers "what" and ideally "where" in one line. The placeholder text ("Short summary of what to do.") is nudging you toward the same thing.
Below that sits the Description, and it is the full Markdown editor, not a plain box. It supports @ mentions to pull in a teammate and #KEY-NUM references to link another issue, both with autocomplete as you type. It arrives pre-filled with the template for whatever type you picked.
Treat that template as scaffolding, not scripture. Keep the prompts that help, delete the ones that do not, write your real detail in between. The placeholder ("More detail. Markdown supported.") appears if you clear it out. Nobody is checking that you filled every heading the template handed you.
One genuinely useful thing happens while you type the summary. Past 3 characters, a "Related issues" hint appears underneath, listing possible duplicates (each with its key, title, and status) as clickable links. This is advisory. It never blocks you from creating; it just gives you a moment to notice that WEB-31 already tracks the same blank-timeline bug before you file WEB-58 about it. If search happens to be unreachable, the hint simply does not appear, and creation works exactly the same.
Setting status, priority, assignee, and labels in the Details panel
The right-side Details panel is where you set everything about the issue that is not its text.
Status is first, and it lists the project's actual board columns, not a fixed menu. For WEB that means Backlog, To Do, In Progress, In Review, Done. Because these are the project's own custom statuses, a different project can have a completely different set. New work usually starts in Backlog or To Do; pick where it honestly sits right now.
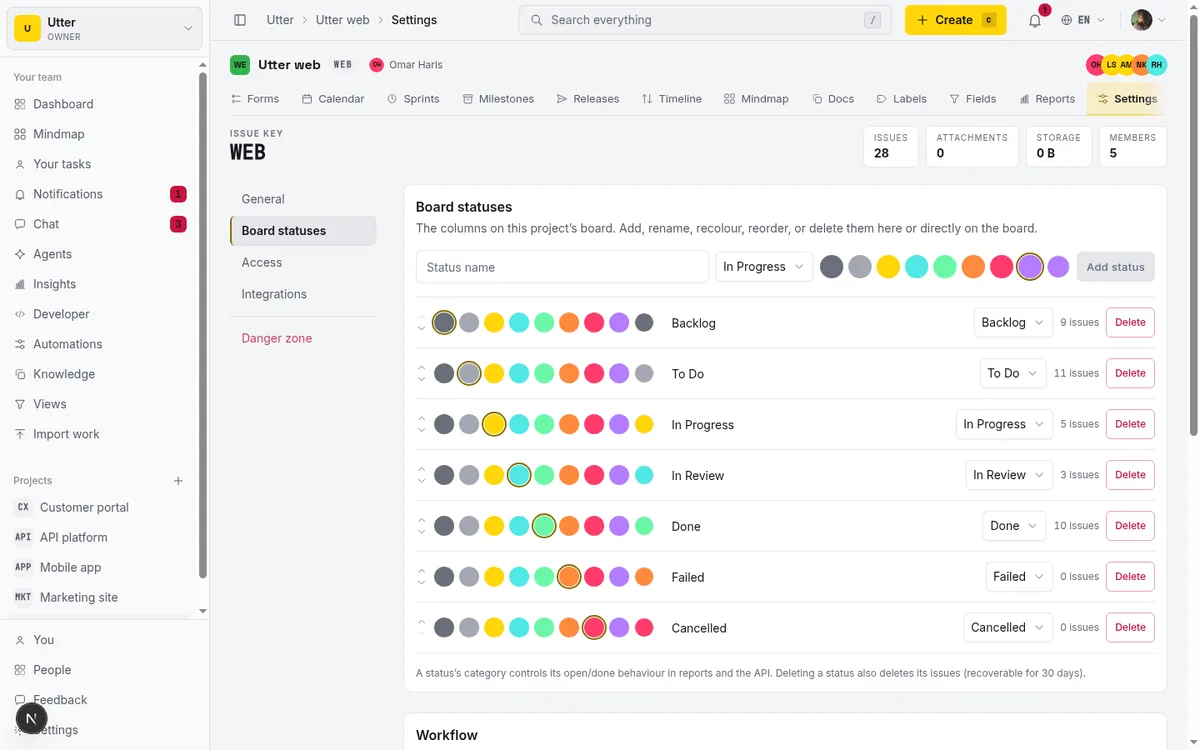
Priority defaults to Medium, which is sane. Bump it to High or drop it to Low only when you mean it. If every ticket is High, none of them are.
Assignee is a multi-assignee picker, so more than one person can own an issue. Leaving it empty means unassigned, which is completely fine when you are filing something for the team to pick up at triage. Do not assign a name just to make the field look answered.
Labels appear as toggle chips for whatever labels the project already has. Click to attach, click again to remove. If the project has none yet, you see "No labels are configured for this project yet." instead, which tells you labels have not been set up (that lives in project settings, not this dialog).
One thing sits above all this in a specific case. If you opened the dialog workspace-wide (not from inside a single project's board) and the workspace has more than one project, you pick the Project first, through a searchable Combobox. Choose it, and the rest of the dialog (statuses, labels, custom fields) reshapes to match that project. On a single-project board the project is fixed and shown read-only, since there is nothing to choose.
Rolling work up to an epic with the Parent epic picker
If you picked any type other than Epic, the Details panel shows a "Parent epic" picker. This is how you say "this task belongs to that bigger initiative."
Get the mental model right, because this is the thing people most often muddle. Stories, tasks, and bugs attach to an epic through the Parent epic field. Not through some generic parent-child relationship. Under the hood, Utter keeps epic membership separate from the parent link that subtasks use, and the dialog reflects that split: the picker literally reads "Parent epic," and choosing one files your task under that epic for rollup and reporting.
flowchart TD
    STORY[Story] -->|epic field| EPIC[Epic]
    TASK[Task] -->|epic field| EPIC
    BUG[Bug] -->|epic field| EPIC
    SUB[Subtask] -->|parent link| STORY
The picker adapts. If your work type is Epic, it is hidden entirely, because an epic does not roll up into another epic. If the project has no epics yet, it is disabled and reads "No epics yet," your cue to create an epic first when you want the grouping.
The containment rules behind this are enforced on the server with plain-language messages, so if you ever break one through the API or an import, you see exactly why:
| What you tried | Server message |
|---|---|
| A subtask with no parent | "Subtasks need a parent issue." |
| A parent link on a story, task, or bug | "Only subtasks can have a parent. For stories under an epic, set epicId." |
| A parent that is itself a subtask | "Parent cannot itself be a subtask." |
| An epic nested under another epic | "An epic cannot be nested under another epic." |
You do not need to memorize these. Internalize the one-liner: to put a story, task, or bug under an epic, use Parent epic, never a parent-child link.
Scheduling, project fields, and the empty-column quick add
Two sections in the dialog stay collapsed until you want them, which keeps the common case clean.
Expand "Schedule and planning" to set dates and, when they exist, milestones and sprints. You always get Start date and Due date, and Utter enforces the obvious constraint: start must fall on or before due. The Milestone and Sprint pickers appear only if the project actually has milestones or sprints set up. If it has neither, those fields are absent, which is correct behavior and not a missing feature. No point offering a sprint picker to a project that does not run sprints.
If the project has custom fields, they show under "Project fields," filtered to the work type you chose. So a field that only applies to Bugs will not clutter the form while you file a Task. Any custom field marked required is validated before the issue can be created, so you cannot skip it by accident.
Now the board shortcut, which is genuinely the fastest way to file work that belongs in a specific column. On the board, an empty column shows a "+ New task" button right inside it. Click it, and the dialog opens already scoped to that exact column: the new issue inherits the column's status and lands there instead of defaulting to Backlog. Say you are grooming your In Review column, it happens to be empty, and you realize a follow-up needs filing. The quick add drops the new issue straight into In Review.
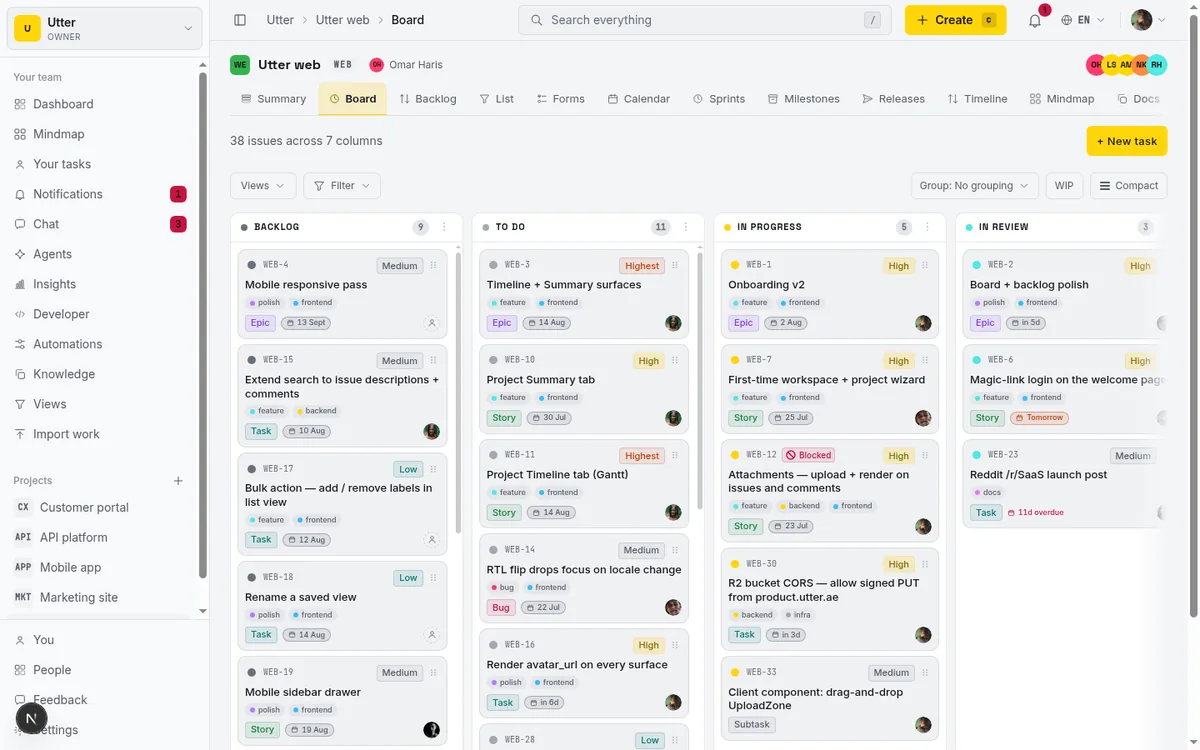
The catch surprises people: this quick add shows up only in empty columns. A column that already holds cards shows the cards, not a "+ New task" button. So do not go hunting for it in a busy column. For those, use c or the topbar Create button and set the status by hand in the Details panel.
Creating subtasks (the one place it works)
Here is the part the New issue dialog quietly refuses to do, and where most of the confusion lives.
You cannot create a subtask from the New issue dialog. You cannot create one with c. Subtask is not in the work-type selector, on purpose. A subtask only exists in relation to a specific parent, so Utter makes you create it from that parent.
Open any existing issue's detail page, say WEB-1, and find the Subtasks card. It has an inline "Add subtask" input. Type a title, press Enter, and the subtask is created under that issue. Press Escape to cancel if you change your mind. That is the whole interaction, and it takes a title and nothing else: no type picker, no priority, no status. The subtask inherits its parent automatically and starts life in the backlog. You can flesh it out later by opening it, but the fast path is title, Enter, done.
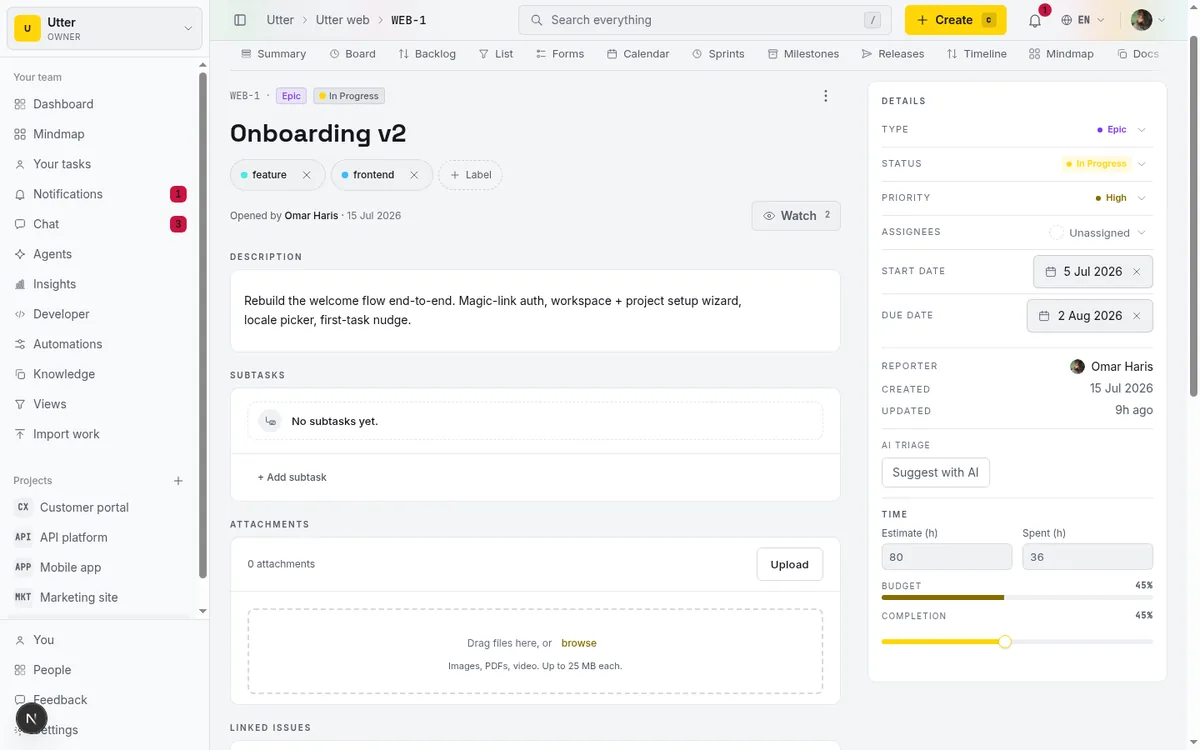
The Subtasks card also earns its keep as a progress tracker. It shows a bar with done over total plus a percentage, and each subtask has a checkbox you tick to mark it done. So a parent story with five subtasks gives you an at-a-glance "3/5, 60%" without opening anything. This is exactly why the design forces subtasks to be born from a parent: a subtask with no parent is meaningless, and the progress rollup only works because the relationship is guaranteed. If you have been hunting for "Subtask" in the create dialog and getting annoyed, this is your answer. Open the parent, use the card.
Faster repeat entry: Create another and Draft with AI
If you are filing a batch, say you just walked out of planning with eight tasks to log, do not create-and-reopen eight times. Tick "Create another" before you hit Create. The dialog stays open after each issue and resets the parts that should change per issue: title, description, dates, labels, epic, milestone, sprint, and custom fields all clear. It keeps the parts that usually stay constant across a batch: type, project, status, priority, assignee. So you set "Task, WEB, To Do, Medium, unassigned" once, then just type title after title. Each create pops a small "Created WEB-51." toast so you know it landed, and you keep moving.
The other accelerator is "Draft with AI," and it only shows up when AI is configured for the workspace. If you do not see it, that is why; it is not hidden behind a setting inside the dialog. When it is there, you type a plain-language prompt describing what you want, press Cmd/Ctrl+Enter, and it drafts the issue: title, description, type, priority, and any matching labels, all filled into the form. Read it, fix what it got wrong, then create. The important part: Draft with AI never creates the issue itself. It only fills the fields for your review. You are always the one who clicks Create. Think of it as a fast first draft for the times you know what you want but do not feel like typing it out.
On a normal create (without "Create another"), Utter takes you straight to the new issue's detail page at its key, so you land exactly where you would want to be to add subtasks, attach a file, or start a comment thread.
The same create, from the API
Everything the dialog collects maps to one endpoint on the public API, which is how scripts and AI agents file work. It is POST /api/v1/workspaces/{slug}/projects/{key}/issues, authenticated with an API key as a Bearer token, and it needs the issues:write scope. Only type and title are required; epic takes a KEY-NUM string, the same rollup rule as the Parent epic picker.
curl -X POST "https://utter.ae/api/v1/workspaces/utter/projects/WEB/issues" \
  -H "Authorization: Bearer $UTTER_API_KEY" \
  -H "Content-Type: application/json" \
  -d '{
    "type": "bug",
    "title": "Timeline + Summary tab loads blank on first paint",
    "priority": "high",
    "epic": "WEB-10"
  }'
const res = await fetch(
"https://utter.ae/api/v1/workspaces/utter/projects/WEB/issues",
{
method: "POST",
headers: {
Authorization: `Bearer ${process.env.UTTER_API_KEY}`,
"Content-Type": "application/json",
},
body: JSON.stringify({
type: "bug",
title: "Timeline + Summary tab loads blank on first paint",
priority: "high",
epic: "WEB-10",
}),
},
);
const { data } = await res.json(); // data.key is the new KEY-NUMimport os
import requests
res = requests.post(
"https://utter.ae/api/v1/workspaces/utter/projects/WEB/issues",
headers={"Authorization": f"Bearer {os.environ['UTTER_API_KEY']}"},
json={
"type": "bug",
"title": "Timeline + Summary tab loads blank on first paint",
"priority": "high",
"epic": "WEB-10",
},
)
res.raise_for_status()
print(res.json()["data"]["key"])A successful create returns 201 with the issue, including its freshly minted key. The containment table above is enforced here word for word, so a subtask without a parent or an epic nested under an epic comes back as a plain-language 400 rather than bad data.
Common limits worth knowing before they surprise you
None of these are gotchas so much as guardrails. Knowing them means you never fight the tool.
- Four types in the dialog, not five. Task, Story, Bug, Epic. Want a subtask? Go to the parent issue's Subtasks card. Full stop.
- The per-column "+ New task" quick add lives only in empty columns. Busy columns show cards instead, so use
cor Create and set the status by hand. - Viewers cannot create issues. No Create button, no
c, no empty-column CTA. That is the role working as intended; to file work you need at least member access. - Draft with AI and the Milestone/Sprint pickers are conditional. AI drafting shows only when the workspace has AI configured. Milestone and Sprint show only when the project has them. Their absence is information, not breakage.
- The Related issues duplicate hint is advisory. It needs a title of 3 characters or more and a reachable search backend, and it will never stop you from filing a duplicate. It is a nudge, not a gate.
- Description templates are editable scaffolds, not enforced structure. Delete every heading if you like. Nobody is checking that you filled the "acceptance criteria" section. The template exists to save you a blank page, and the templates are localized too, so an Arabic workspace gets Arabic scaffolds.
That is the whole surface. Open the dialog three ways, pick from four types, write a summary future-you can act on, set the details, roll up to an epic when the work belongs to one, and make subtasks from the parent. Once the issue exists, the natural next steps are getting it onto the board and through triage. To go deeper there, read how to use a kanban board for the flow after creation, and AI issue triage that assigns and prioritizes for letting the system route new issues for you. For why any of this is shaped the way it is, what is agentic project management and our take on Utter vs Jira both cover the reasoning.
Ready to file your first one? Open your board and press c.
Frequently asked questions
How do I create an issue in Utter?
Press c anywhere in a workspace, click the yellow Create button in the topbar, or click "+ New task" in an empty board column. Any of the three opens the New issue dialog. Type a summary (the only required field), optionally set type, status, priority, and assignee, then click Create. You need at least member access; viewers cannot create.
What is the keyboard shortcut to create a new issue?
It is c. Press it from anywhere in a workspace and the dialog opens. It is deliberately ignored while you are typing in a field (input, textarea, select, or an editable area) and while you hold Cmd, Ctrl, or Alt, so you will not fire it mid-sentence.
What is the difference between a task, story, bug, and epic in Utter?
Task is a discrete piece of work. Story is user-facing behavior described from the user's point of view. Bug is something broken. Epic is a big container that stories, tasks, and bugs roll up to. The type also picks the description template and feeds reporting, so it is worth choosing on purpose rather than leaving everything as Task.
How do I create a subtask in Utter?
Open the parent issue's detail page and use the Subtasks card's inline "Add subtask" input. Type a title, press Enter (Escape cancels). The subtask inherits the parent and starts in the backlog. Subtasks cannot be created from the New issue dialog.
Why can't I select Subtask in the New issue dialog?
Because a subtask only makes sense underneath a specific parent, and the create dialog can be opened from anywhere with no parent in context. So the dialog offers only Task, Story, Bug, and Epic, and subtasks are created from the parent issue's Subtasks card instead.
How do I add a task directly to a specific board column?
If the target column is empty, it shows a "+ New task" button inside it. Click that and the dialog opens pre-scoped to that column's status, so the created issue lands there. If the column already has cards, that button does not appear; open the dialog normally and set the Status field to that column by hand.
How do I attach an issue to an epic?
For any non-epic type, use the "Parent epic" picker in the dialog's Details panel and choose the epic. Stories, tasks, and bugs roll up to an epic through this field, not through a parent-child link. The picker is hidden when the type is Epic, and disabled with "No epics yet" when the project has no epics.
Can I create several issues in a row without reopening the dialog?
Yes. Tick "Create another" before creating. The dialog stays open and resets the title, description, dates, labels, epic, milestone, sprint, and custom fields, while keeping type, project, status, priority, and assignee. Each create shows a "Created KEY-NUM." toast so you can file a whole batch quickly.
Why can't I create issues when I can only see them?
You are almost certainly a viewer. Creating requires the issue.create permission, which owners, admins, and members have but viewers do not. With viewer access there is no Create button, c does nothing, and the empty-column quick add is hidden. Ask a workspace owner or admin to raise your role.
Related reading
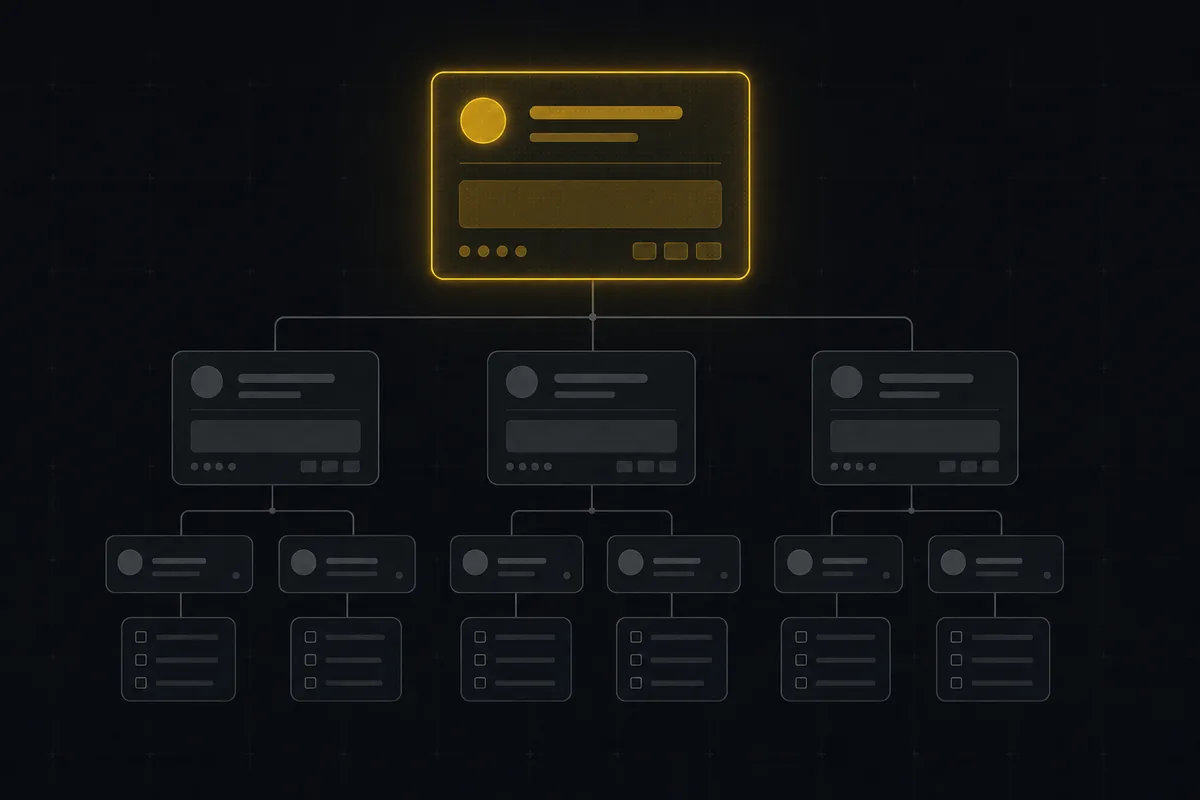
How to organize work with epics and subtasks
Learn Utter's epics, stories, tasks, subtasks hierarchy: group work under an epic, break issues into subtasks, read the progress bar, and the rules it enforces.
July 15, 2026 · 17 min read
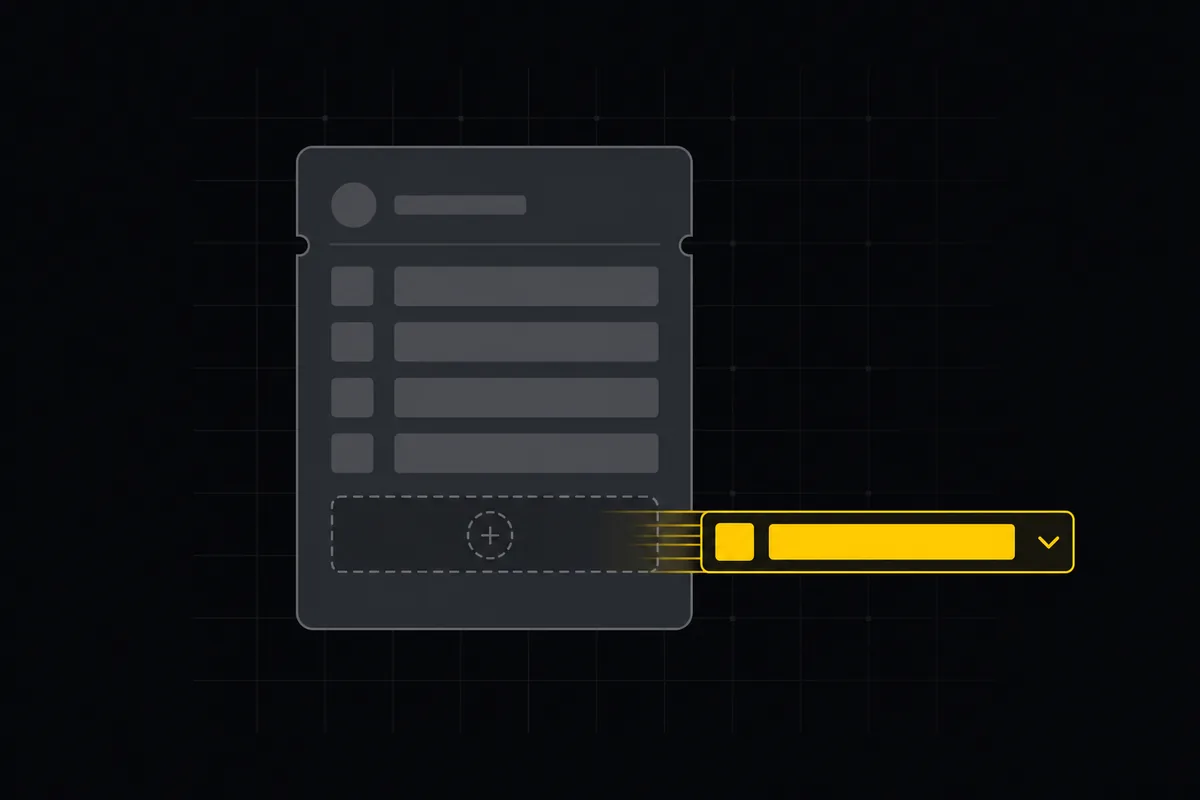
Custom fields in issue tracking
Add custom fields in an issue tracker: create project-scoped fields, pick the right kind, make them required, and show them as List columns and filters in Utter.
July 15, 2026 · 18 min read
How to use a kanban board: a complete guide with a real example
Learn how to use a kanban board in Utter: read cards, drag tasks between columns, add and reorder custom columns, set WIP limits, filter, and save views.
July 15, 2026 · 20 min read

Keyboard shortcuts in utter
Every keyboard shortcut in Utter: the ? overlay, command palette, quick create, g-chords, and a/s/p/l/m field pickers, where each fires, and how to learn them.
July 15, 2026 · 15 min read
A bug tracking workflow that runs from report to fix
Bug tracking workflow that runs report to fix in one tool: public intake form, AI triage, a board review gate, GitHub commit links, and auto-shipped releases.
July 16, 2026 · 12 min read
How to set up a request form
Build a public intake form in Utter that creates tickets: map fields to issue title, description and priority, route submissions, publish a no-account link.
July 15, 2026 · 14 min read
How to filter and sort issues
Filter issues by assignee, label, and status in Utter's list view, then sort, group, save a view, and share the exact filtered list as a URL.
July 15, 2026 · 16 min read
How to set up automations
Set up project management automation rules in Utter: the when/if/then model, six triggers, conditions, nine actions, run history, plan caps, and real limits.
July 15, 2026 · 18 min read
How to search your workspace
Search issues across projects in Utter from one top-bar field: the / shortcut, live typeahead, WEB-12 key-jump, the full results page with Type/Status/Priority filters, and the real limits.
July 15, 2026 · 14 min read
How to add board columns
Add, rename, reorder, and delete kanban board columns in Utter: statuses, categories, colours, permissions, and the delete gotchas, with the limits named.
July 15, 2026 · 15 min read
أضف تعليقًا
ابدأ النقاش.