
How to set up a request form
You keep getting the same request three different ways. A Slack ping. A forwarded email. Someone catching you at your desk with "hey, can you look at this real quick." Every one lands in your tracker as a half-described mess, and then you spend the afternoon chasing the reporter for the browser they were on, the URL that broke, the screenshot they swear they took. If you have ever wanted an intake form that creates tickets instead of another shared inbox to sift through, Utter builds one into every project.
This tutorial walks the whole loop. You build a public request form inside a project, map its answers onto real issue fields, publish a shareable link that needs no account, route the tickets it opens so they land in the right column, and verify on the Submissions tab that every response is tied to the KEY-NUM task it created. I will name the limits as we go, because knowing what a tool refuses to do is half of using it well.
Why an intake form that creates tickets beats a shared inbox
Here is the actual problem. Requests arrive as prose, in whatever shape the sender felt like typing, across three or four channels. A shared inbox does nothing to fix that. It moves the mess into one place, still unstructured, still needing you to re-key each one into your tracker by hand, still missing the fields you need to triage.
A form fixes the shape of the request at the source. You decide what to ask. The submitter fills in your fields, not a blank text box, and Utter turns each submission into a real task in the project. No re-typing. A form is a small contract about what a good request looks like, and it gets enforced before anything reaches your board.
Utter goes one step past collecting the answer. Every submission creates a task in the project the form lives in, then runs that workspace's issue.created automations on top, so your auto-assign and triage and routing rules fire exactly as they would for a hand-typed ticket. The pipeline, start to finish:
flowchart LR
  A["Submitter opens /f/token"] --> B["Honeypot and rate limit checks"]
  B --> C["Issue created with mapped fields"]
  C --> D["Routing defaults applied"]
  D --> E["issue.created automations run"]
  E --> F["Ticket on your board"]
If you want the deeper version of that pipeline, turning a request form into a triaged issue covers it end to end.
Two things to set expectations before you start. Forms live per project, not per workspace, so you build them where the work lands. And building them is gated: only workspace owners and admins hold form.manage, so only they can create or edit a form. A member with issue.create can open the builder and use Test submit, but cannot change the form. That is deliberate. A public form is an attack surface, and you do not want everyone minting them.
Where forms live and creating your first one
Open the project you want requests to land in. For this walkthrough I am using the demo project WEB, whose board runs Backlog, To Do, In Progress, In Review, Done. In the project's tab strip you will find a Forms tab. Click it.
The Forms list is your inventory. Each form shows its status (draft, published, or closed), a Public badge when its link is live, and a submission count so you can see at a glance which forms are actually pulling traffic. On a fresh project the list is empty except for the one entry point you need: + New form.
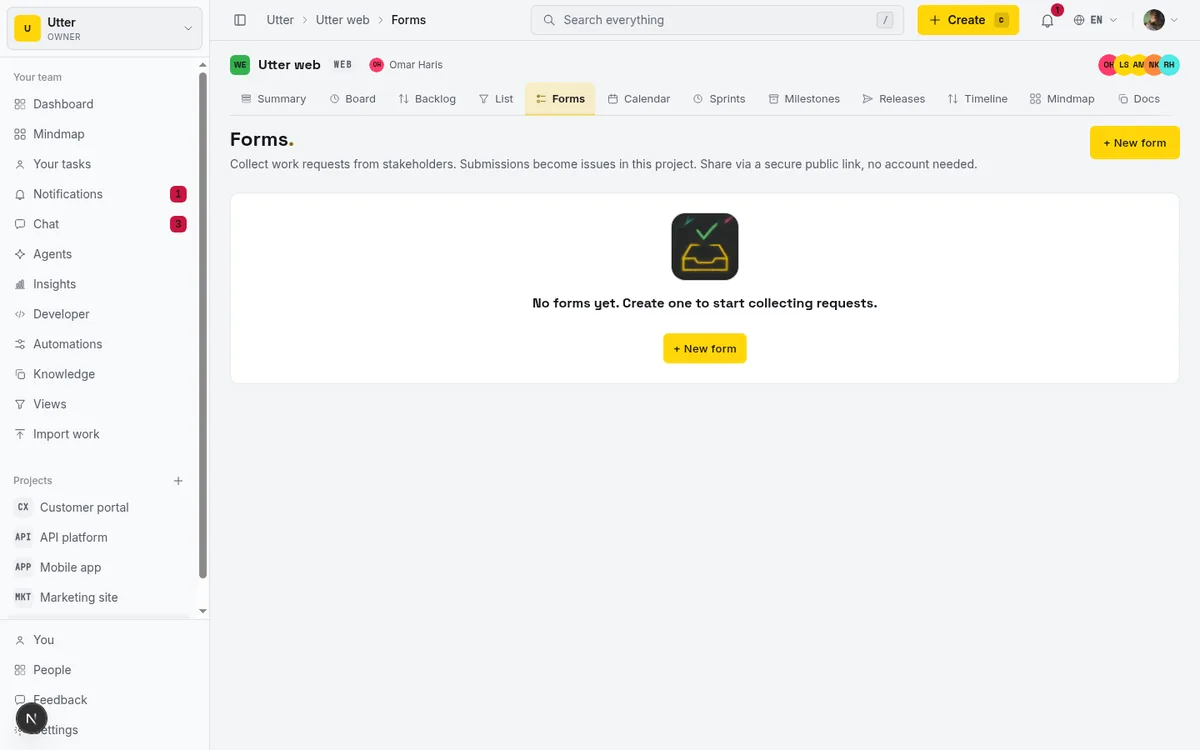
Click + New form. The Create a form dialog opens with the choice that shapes everything after it: start from scratch, or pick a ready-made template. Blank form seeds a single starter field, a Summary short-text question already mapped to the issue title, which means the form works the instant you create it. No dead form that collects nothing. The alternative is one of ten templates: Contact us, Bug report, Feature request, Support, Job application, Event registration, Survey, Lead capture, Content request, Onboarding.
For a support or bug intake, start from the Bug report template. It arrives with the fields a good bug ticket needs already laid out, and editing an existing field is faster than inventing one from nothing. Give the form a name in the "Form name, e.g. Bug report" box, something the submitter never sees but you will recognise in the list, then click Create. You land in the builder.
Building the form: the 14 question types
The builder opens on the Build tab, where the form takes shape. You see the ordered list of questions, and above them a + Add question button. Click it and the menu is grouped so you are not scrolling a flat list of thirty things:
- Text: Short text, Paragraph
- Choice: Dropdown, Single choice, Checkboxes
- Number & rating: Number, Rating
- Contact: Email, Phone, Link
- Date: Date
- File: File upload
- Layout: Section, Yes / No
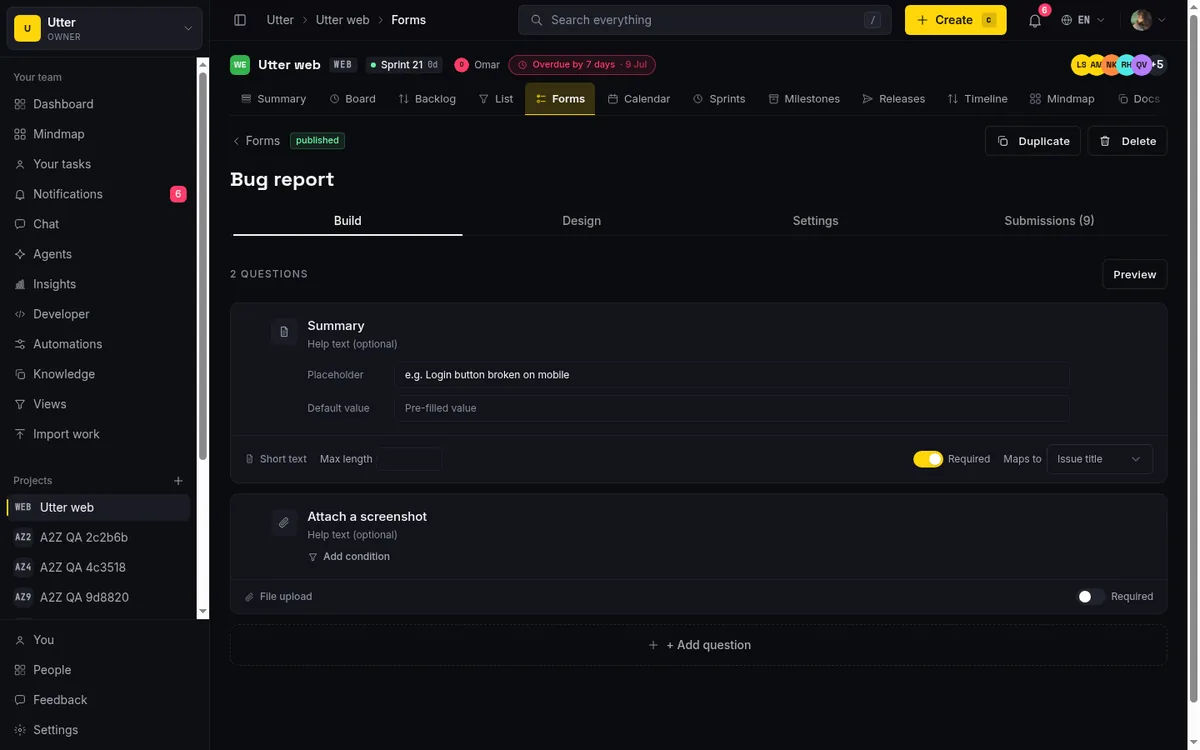
Fourteen kinds, and it is a fixed set. Be honest with yourself about that up front. There is no rich-text field, no signature capture, no payment field, no multi-file uploader. A File upload field takes exactly one file. If your intake genuinely needs a signature or a card on file, a form is the wrong tool, and faking it will only frustrate you.
Each question has its own config panel. You set the label (the question the submitter reads), optional Help text, and a Placeholder for text fields. The Required toggle decides whether the form can be submitted without it. For the three choice kinds (Dropdown, Single choice, Checkboxes) you type the options one per line. Depending on the kind you also get validation: Min and Max on a Number, Max length on text, Stars on a Rating, a Default value where it makes sense.
You arrange questions by dragging the handle, or with Move question up and Move question down if you prefer clicks. You can delete a question. And you can Duplicate the whole form when you want a variant without rebuilding: fields, settings, branding, and routing carry into a fresh draft, minus the token, the uploaded branding assets, and the password.
Here is a concrete Bug report form worth copying. A Summary short text ("What went wrong?"). A Paragraph for steps to reproduce. A Single choice for severity, options one per line. And a File upload so the reporter can attach the screenshot they actually took this time. Four fields, every one earning its place.
Mapping fields so submissions become structured issues
This is the part that separates an intake form from a plain contact form, and it is the reason to use Utter for this at all. Each field has a Maps to target that decides where its answer lands on the created issue.
Three real destinations, plus "keep it in the submission":
- Issue title. The first field mapped to the title wins, so order matters. Title accepts short text, long text, email, url, phone, or number.
- Issue description. short text or long text.
- Issue priority. This one is fussy on purpose. Only a Dropdown or Single choice can map to priority, and only when its options are the literal priority names: lowest, low, medium, high, highest, critical. There is a Use priority options helper that fills those in for you, so you do not fat-finger "hihg" and quietly break the mapping.
Anything you do not map is not thrown away. Unmapped answers become a labelled detail list at the bottom of the issue description, so the steps to reproduce, the browser, the account email, all of it lands in the ticket even though none of it is the title. Nothing is lost. It just does not become a first-class field.
flowchart TD
  Q["Form field answer"] --> M{"Maps to"}
  M --> T["Issue title"]
  M --> D["Issue description"]
  M --> P["Issue priority"]
  M --> N["Not mapped"]
  N --> L["Detail list at the bottom of the description"]
For the Bug report form, map Summary to Issue title and the severity Single choice to Issue priority (with priority-name options). Now a submission that reads severity "high" opens an issue already at High priority, and the summary line is the ticket's title instead of a wall of text.
Two more knobs live at the form level rather than the field level: the form's issue Type (Task, Story, or Bug) and its default Priority (lowest through critical). Every issue the form creates inherits those. Set the Bug report form's Type to Bug and you never reclassify.
That is the whole mapping surface, honestly: title, description, priority, or none. There is no field-to-assignee or field-to-label mapping. If you need those set per ticket, that is a routing default, which we get to below. For how a created issue reads once it lands, how to create an issue is the companion piece.
Conditional logic with "Show only if"
Long forms lose people. The fix is to ask each question only when it is relevant, and every field has a Show only if control for exactly that. You pick a Condition field (another question on the form), an operator, and a Value, then click Add condition.
The operators are is, is not, contains, is answered, and is empty. So you can say: only show "Which browser?" when a "Bug type" single choice is "Visual glitch." Somebody reporting a billing problem never sees the browser question, and the form stays short for everyone.
One behaviour here is worth internalising, because it saves you from a classic mistake. A hidden field is not rendered, is not required, and its answer is dropped server-side. You cannot accidentally require a field that a condition is hiding. The form will never wedge itself into a state where a submitter is blocked by a question they cannot see. The Required toggle and the Show only if condition simply cannot fight each other into a trap.
Branding the public form on the Design tab
Switch to the Design tab, labelled Branding in the builder. This is the face external submitters see, and since half of them may not know Utter exists, it is worth thirty seconds of care.
You can set an Accent color as a hex value, upload a Logo, and add a Cover image. The cover accepts PNG, JPG, WebP, or GIF up to 5 MB, uploaded through a presigned flow like every other upload in Utter. There is a Header text field, and a Show project name toggle if you want the project name on the public page.
Keep it light. One accent colour that matches your brand, a logo, maybe a cover, done. Note the two size caps so you do not confuse them later: branding assets (logo and cover) cap at 5 MB, while files a submitter attaches through a File upload field cap at 10 MB. Different limits, different purposes.
Routing, delivery, and access under Settings
The Settings tab does the heavy lifting, and it splits into a few groups.
Routing applies to every task the form creates, and the note on the panel says it plainly: your automations run on top. Here you set Assign to (a workspace member, or an agent, which shows with an "(agent)" label), Labels, Sprint, and Status. That Status field is the quiet hero. Point it at Backlog and every bug the form files drops straight into Backlog instead of some default column you then have to drag things out of.
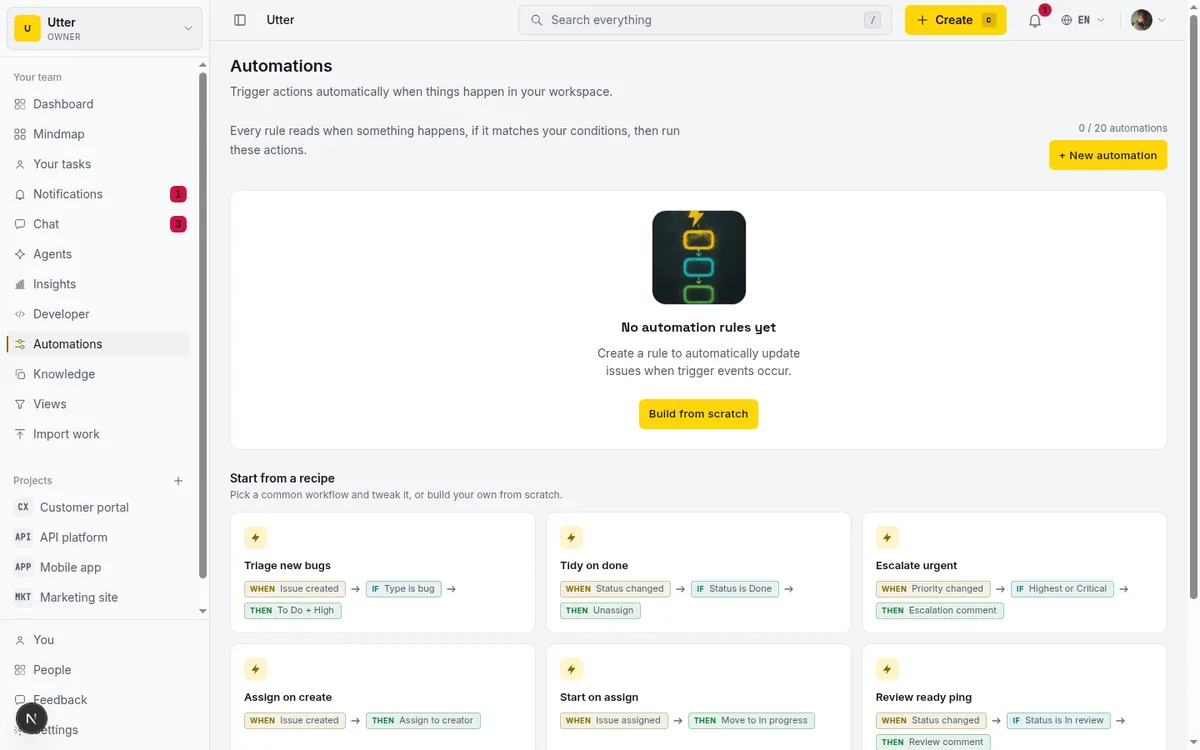
Assigning to an agent behaves specially: it opens a pending agent session, so a routed agent is queued to pick the work up rather than silently owning it. For the human side of that handoff, human-in-the-loop approval for AI agents is the right read.
Delivery and limits controls the submission experience. Set a Close date to auto-close the form after a deadline. Set a Response limit to cap total submissions. Turn on One response per email if you need to dedupe by submitter, which makes the submitter email required. And After submit chooses what happens when someone hits send: Show a message (a thank-you you write) or Redirect to a URL.
Access decides who can even open the form. Three audiences:
| Audience | Who gets in |
|---|---|
| Anyone with the link | Truly public, no account needed |
| Project members | A signed-in workspace member, plus a project member when the project is scoped |
| Invited emails only | Signed in, with their email on the allowlist you paste one per line |
Independent of the audience, you can add a Password, scrypt-hashed, required to open the form.
Now the honest limits, because this is where over-configuring bites. Routing is tenant-safe by design, which means an over-specified Status, Sprint, assignee, or Labels value that no longer belongs to the project gets silently dropped rather than applied wrong. Delete a label and forget the form still references it, and the form does not error; it just applies one fewer default.
The Redirect URL must be an absolute http or https URL; javascript: and data: schemes are rejected outright. And the password unlock is a 12-hour cookie bound to the current password hash, so rotating the password invalidates every prior unlock. There is no separate "form account." Restricted audiences reuse Utter's normal magic-link sign-in.
Publishing and sharing the link
Everything so far has been a draft. To go live, find the Public link toggle and turn it on. That mints a 40-hex-character token, sets the form's status to published, and the form is instantly live at /f/<token>. Use Copy link to grab the URL, or Open form to see it. For the Anyone-with-the-link audience, whoever you send it to needs no account.
Before you blast that link to a customer list, use the builder's Preview and Test submit. Test submit is not a mock. It creates a real issue through the internal path, so you see exactly what a submission produces, mapping and routing and all, without waiting for a stranger to try it. Fix what looks wrong, then share.
What the submitter sees is a clean branded page: your accent colour, logo or cover, header text, then your fields. If you did not turn on One response per email, there is an optional "Your email" field. A Submit request button. After they send, either your thank-you message or your redirect. At the bottom, a small "Powered by Utter." That is it.
Two Notifications settings are worth flipping on in the same panel. Notify me of new submissions sends the form owner an email and an in-app ping per submission. Send submitters a confirmation email drops a copy of your thank-you message to anyone who left an email.
One note on discoverability: the /f/<token> page is intentionally noindex and nofollow. It will not show up in Google, and that is on purpose. It is a share link, not a landing page. If you want the form found, you link to it yourself.
Reviewing submissions and proving the loop
Open the Submissions tab. This is where the "creates tickets" promise gets proven, not just claimed. You get a searchable list of every response. Each row links to the KEY-NUM task it opened and shows that task's current status, so you can watch a raw public submission become, say, WEB-142 sitting in Backlog, assigned, labelled, its priority set from the severity dropdown. A View detail panel shows the full submission behind any row. Export CSV gives you a file with a label header and one row per submission when you want the data outside Utter.
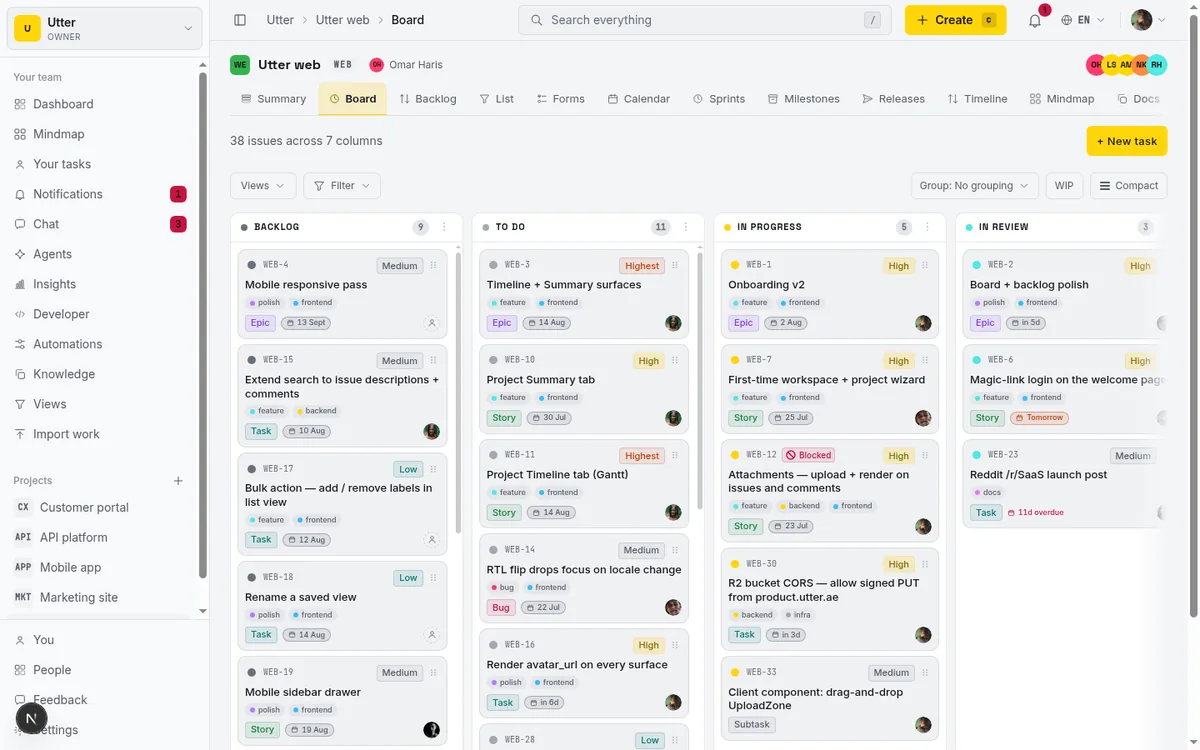
File attachments close the loop physically. An anonymous submitter can attach one file per File upload field, presigned straight to storage. The allowed types are PNG, JPG, GIF, WebP, PDF, DOC, DOCX, XLS, XLSX, TXT, CSV, and ZIP, up to 10 MB each, and on submit the file is attached to the created issue. So the screenshot the reporter uploaded is right there on WEB-142, not buried in an email thread.
Now the limits, plainly. There are no per-question analytics, no partial-save or resume, no multi-step wizard, no spreadsheet-style editable grid. Submissions are a searchable list, a detail panel, and CSV export. Both the list and the export are capped at the 100 most recent responses. For a steady intake stream that is fine, because you triage each one into a ticket as it arrives and the ticket is the durable record. If you expect thousands and want every raw submission kept forever, export regularly. Do not treat the Submissions tab as your archive.
Pulling submissions over the REST API
The v1 API has no 100-row cap: GET /v1/workspaces/{slug}/projects/{key}/forms/{id}/submissions pages through everything with a cursor, newest first, up to 200 rows per page. It needs an API key with the forms:read scope. Get the form id from the forms list endpoint first, then page:
curl "https://utter.ae/api/v1/workspaces/utter/projects/WEB/forms/<form-id>/submissions?limit=200" \
  -H "Authorization: Bearer utp_live_a1b2..."
const res = await fetch(
"https://utter.ae/api/v1/workspaces/utter/projects/WEB/forms/<form-id>/submissions?limit=200",
{ headers: { Authorization: "Bearer utp_live_a1b2..." } },
);
const { data, pagination } = await res.json();
// pass pagination.next_cursor back as ?cursor= for the next pageimport requests
res = requests.get(
"https://utter.ae/api/v1/workspaces/utter/projects/WEB/forms/<form-id>/submissions",
headers={"Authorization": "Bearer utp_live_a1b2..."},
params={"limit": 200},
)
body = res.json()
rows, next_cursor = body["data"], body["pagination"]["next_cursor"]Each row carries the raw answers plus the issue the submission created:
{
  "id": "0197c2ae-...",
  "answers": { "field-id-1": "Checkout button does nothing", "field-id-2": "high" },
  "submitter_email": "[email protected]",
  "source": "public",
  "created_issue_id": "0197c2ae-...",
  "created_issue_key": "WEB-142",
  "created_at": "2026-07-15T09:12:44.000Z"
}
When pagination.next_cursor comes back null, you have everything.
Common mistakes, limits, and deleting a form
A few practitioner notes that will save you a support ticket of your own.
Forgetting to map a title field is the most common one. Nothing breaks; the unmapped answers still land as that labelled detail list. But the issue title reads poorly, because without a title-mapped field Utter has nothing good to put there. Always map one field to Issue title. On the flip side, requiring a field that a condition hides cannot cause a problem, since hidden fields are never required, which is exactly why that behaviour exists.
Priority mapping trips people up because it only works on a Dropdown or Single choice whose options are literal priority names. Map a Short text to priority and it will not take. Use the Use priority options helper and you skip the whole class of typo.
The submitter's email is optional unless One response per email is on, at which point it becomes required. If you need every submission tied to an email, turn that on rather than hoping people fill the optional field. And File upload only works if the form actually contains a File upload field; there is no hidden attachment slot.
Rate limits and a honeypot run automatically to keep bots and floods out. You do not configure them, and you certainly do not tell submitters to work around them. They are just there.
Deleting is gentle. Delete this form soft-deletes it and disables the public link, so the /f/<token> URL stops working, but every issue the form already created is kept. You lose the intake surface, not the work.
That is the whole loop: a public form, mapped to real issue fields, routed into your board, verified on the Submissions tab, with the honest edges named. Open the Forms tab in your project and build the first one.
Frequently asked questions
How do I set up an intake form that creates tickets in Utter?
Open a project's Forms tab, click + New form, pick Blank form or a template like Bug report, then map your fields to Issue title, description, or priority. Toggle the Public link on to publish it at /f/<token>, and every submission becomes a real task in that project.
Does the person filling out the form need an Utter account?
Not for the default audience. If Access is set to Anyone with the link, submitters need no account at all. Only the Project members and Invited emails only audiences require a signed-in user.
How do form answers map onto an issue?
Each field has a Maps to target: Issue title, Issue description, Issue priority, or kept in the submission only. The first field mapped to the title wins, and anything unmapped lands as a labelled detail list at the bottom of the issue description, so nothing is lost.
Can a form set the priority automatically?
Yes, but only from a Dropdown or Single choice whose options are the literal priority names (lowest, low, medium, high, highest, critical). Use the Use priority options helper to fill those in exactly, since a typo silently breaks the mapping.
Where do I see the submissions and the tickets they created?
The Submissions tab lists every response, each row linked to the KEY-NUM task it opened with that task's current status, plus a View detail panel and Export CSV. Note that the list and the CSV are capped at the 100 most recent responses, so export regularly if you need a full archive.
Can submitters attach files like screenshots?
Yes, if the form contains a File upload field. Anonymous submitters can attach one file per field (PNG, JPG, GIF, WebP, PDF, DOC, DOCX, XLS, XLSX, TXT, CSV, ZIP, up to 10 MB each), and the file is attached to the created issue on submit.
Who is allowed to build a form?
Only workspace owners and admins, who hold the form.manage permission. A regular member with issue.create can open the builder and use Test submit but cannot create or edit a form, since a public form is an attack surface.
What happens to existing tickets if I delete the form?
Delete this form soft-deletes it and disables the public link, so the /f/<token> URL stops working. Every issue the form already created is kept, so you lose the intake surface, not the work.
Related reading
Turn a request form into a triaged issue automatically (no human inbox in the middle)
How to wire a public intake form to a tracked, classified issue: routing defaults, an issue.created automation, and an AI triage first pass.
June 16, 2026 · 7 min read
A bug tracking workflow that runs from report to fix
Bug tracking workflow that runs report to fix in one tool: public intake form, AI triage, a board review gate, GitHub commit links, and auto-shipped releases.
July 16, 2026 · 12 min read

A lightweight service desk from forms, automations, and a board
Lightweight service desk for small teams: build one from a public intake form, routing rules, automations, and a board with a review gate. Honestly costed vs JSM.
July 16, 2026 · 12 min read

How to create an issue
Learn how to create an issue in Utter three ways, pick the right type, fill the dialog, roll up to an epic, and make subtasks. With the real limits named.
July 15, 2026 · 16 min read
Custom fields in issue tracking
Add custom fields in an issue tracker: create project-scoped fields, pick the right kind, make them required, and show them as List columns and filters in Utter.
July 15, 2026 · 18 min read

How to track and vote on feedback
A hands-on tour of Utter's product feedback board and roadmap: post ideas, vote, and read the Tracking board and Changelog as a live public roadmap.
July 15, 2026 · 17 min read

How to create your first workspace
Getting started with a project management tool: sign in with a magic link (no password), create your first workspace and slug, and set a permanent project key.
July 15, 2026 · 15 min read

What you can run in Utter without extra tools
A straight, capability-forward tour of the jobs Utter covers in its core, from a light help desk to integrations, estimation, and roadmaps, and when to pair a dedicated tool.
July 16, 2026 · 8 min read
How to use the rest api
Get an Utter API key and use the project management REST API to list, create, and update issues safely, with scopes, idempotency keys, and rate limits explained.
July 15, 2026 · 16 min read

Auto-triage new issues with AI: a setup that actually assigns, labels, and prioritizes
How to set up AI issue triage automation that classifies severity, labels, and routes new bugs and requests, with an honest line on what to let AI decide.
May 27, 2026 · 8 min read
Add a comment
Start the conversation.