
How to create your first workspace

You decided to try a new project management tool, and the first screen asks for something you did not expect. No password. Just your email. That is the whole login form.
If you have spent years typing passwords into every SaaS signup, this looks slightly wrong, like a door that got left open. It was not. Getting started with a project management tool usually means a registration form, a password you will forget, and a verification email on top. Utter skips the first two. Here is exactly what happens next, and how to go from that empty email field to a real workspace with a real project in about five minutes.
You are probably one of two people right now. A team lead who needs somewhere to put the work before the next sprint starts. Or a solo user who is tired of tracking tasks in a notes app. You both want the same thing: a place to track work that does not fight you on the way in. Good news. There are three real moves here. Sign in, create a workspace, create a project. Everything else is detail, and I will give you the detail so nothing surprises you.
Why getting started with a project management tool trips people up
Most tools make you earn your way to the actual product. You fill in a name, an email, a password, you confirm the password, you solve a captcha, you pick a plan, and only then do you see an empty board. By the time you get there your patience is gone. The first wall is almost always the account: registration and a password before you have seen a single feature.
Utter has no passwords. None. There is no password field anywhere in the product, and there is no separate "Sign up" page either. The first time you sign in with your email, your account gets created for you.
That is the piece that trips people up. They go hunting for a registration form that does not exist. So before anything else, drop the assumption that you need to "make an account." You do not. You request a link, you click it, you are in.
The three moves, in order:
flowchart LR
    A[Sign in with a magic link] --> B[Name your workspace and claim its slug]
    B --> C[Create a project with a permanent key]
    C --> D[Your board]
Let me walk each one, including the parts that are easy to get wrong.
Sign in with no password using a magic link
Go to /login. You will see one field labeled "Your email" with the placeholder [email protected], and a button that says "Email me a link." Below that, a small hint: "First time here? We will set you up automatically." That hint is doing real work. It is telling you there is no registration step. Type your email, click the button (it changes to "Sending…" while it works), and you are done with this screen.
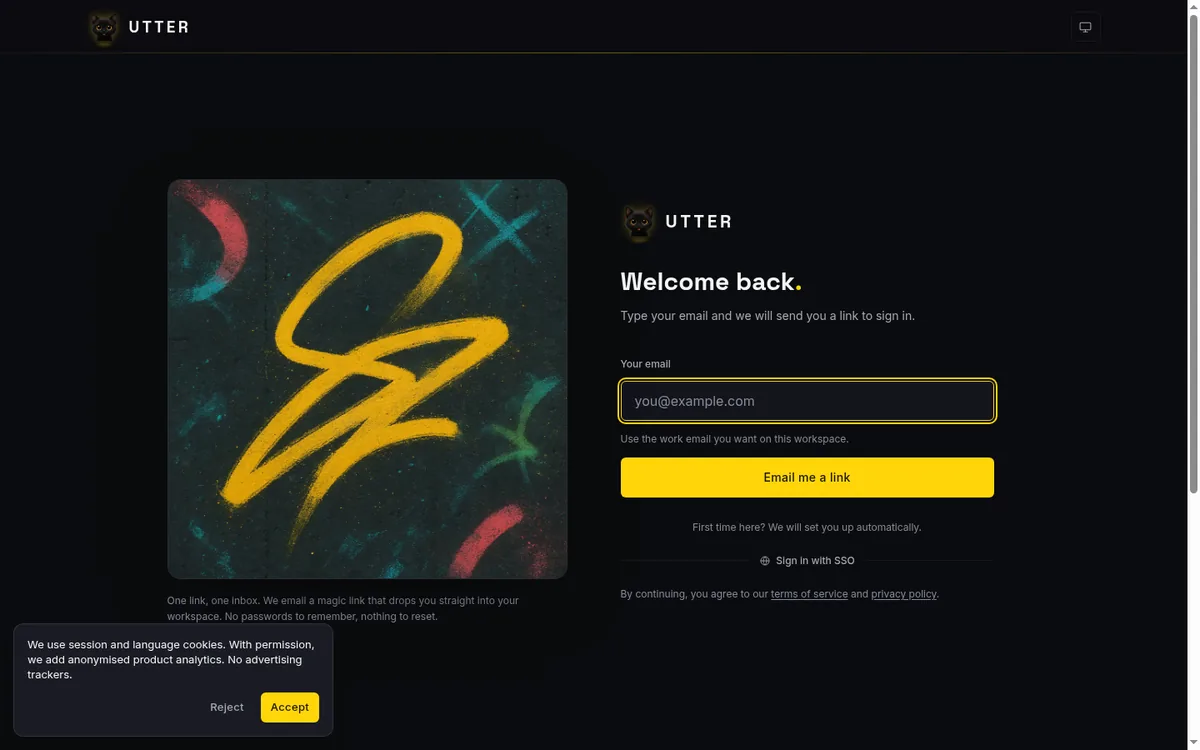
Here is what happens under the hood, because it is worth understanding once. The form posts your email to the auth endpoint:
curl -X POST https://utter.ae/api/auth/request \
  -H "Content-Type: application/json" \
  -d '{"email": "[email protected]"}'
The server mints a single-use token, 32 random bytes, and stores only a SHA-256 hash of it, so even someone reading the database cannot replay your link. That token gets a 15-minute time-to-live and lands in your inbox as a clickable link. In development the link is also printed to the server console, which is handy if you are running Utter locally with no SMTP wired up. In production it just arrives in your email.
One deliberate behavior worth calling out. The endpoint always returns the same response whether your email is known, unknown, or currently rate-limited:
{ "ok": true }That is enumeration resistance. Nobody can poke this form to discover which addresses have Utter accounts, because the form gives away nothing. In practice it means you will never see a "no account found" error. There is no such thing here. If the email is valid, a link is on its way. If the email was never seen before, that same link creates your account when you click it. This is why there is no separate sign-up form. Signing in and signing up are the same action.
What the 'Check your inbox' screen actually means
After you submit, the page flips to a confirmation state. It reads "Check your inbox." with the line "We sent you a link. Click it within 15 minutes to sign in." It shows "Sent to" and your email so you can confirm you did not fat-finger it, plus two buttons: "Send another link" and "Use a different email."
Read that 15-minute window literally. The link is single-use and it expires 15 minutes after it is minted. Get distracted, come back an hour later, and the link is dead. Clicking it will not sign you in. That is not a bug. It is the point. Hit "Send another link" and a fresh one arrives. The old one is now worthless even if someone found it.
A subtle thing that saves confusion: some email clients pre-fetch links to build previews. That HEAD request does not spend your token. The server answers a preview probe with a 204 and leaves the token unused, so your link still works when you actually click it. Without this, corporate mail scanners would quietly burn every magic link before you touched it.
Now rate limiting, honestly. You can request 5 links per 5 minutes per email-plus-IP, with a stricter ceiling of 10 per hour per email. Mash "Send another link" too many times and the request gets throttled.
Here is the part that matters: a throttled request shows you the exact same "Check your inbox" screen, with a rate-limited hint, not an angry error. It never looks broken. It just stops sending. If links suddenly stop arriving after several tries, that is what happened. Wait a few minutes.
When you finally click a valid link, it hits /sign-in/[token], consumes the token, and sets your session cookie. That cookie is up_sess, it is HMAC-signed, and it lasts 30 days. It is not a database-backed session. The signature is the proof, which is why sign-in feels instant.
The whole exchange, end to end:
sequenceDiagram
    participant B as Your browser
    participant S as Utter
    participant M as Your inbox
    B->>S: POST /api/auth/request with your email
    S->>S: Mint token, store only its SHA 256 hash
    S->>M: Email the link (15 minute TTL)
    S-->>B: Same ok response every time
    M->>B: You click the link
    B->>S: GET /sign-in/[token]
    S->>S: Consume token, set signed up_sess cookie
    S-->>B: Redirect to /onboarding or /me
Then it redirects you. A brand-new user with zero workspaces lands on /onboarding. An existing user lands on /me, which forwards to their most recent workspace. If a link had a specific next destination baked in, that wins. For your first time, you are heading to onboarding.
Create your first workspace and choose a slug
You have arrived at /onboarding. The heading says "Name your team," with a quiet "Step 1 of 1" marker. That marker is a promise: this is the only setup screen. There is no five-page wizard behind it.
Two fields. First, "Team name." If Utter picked up a first name from your email, this pre-fills as something like "Sam's team" so you are not staring at a blank box. Change it to whatever your workspace is actually called. "Acme HQ", your company name, your side project's name.
Second, "Web address." This is your workspace slug, shown after a fixed /w/ prefix so you can see the real URL you are about to own: /w/acme. The slug auto-derives from the team name as you type, right up until you edit it yourself, at which point it stops following the name and stays where you put it.
As you type the slug, watch the line underneath. It says "Checking availability…" for a beat, then resolves to "/w/your-slug is available" in green or "/w/your-slug is already taken" in pink, plus reserved and invalid states when they apply. That is a debounced call running live, so you know before you submit whether your address is free:
GET /api/workspaces/check-slug?slug=acme{ "ok": true, "available": true }The real slug rules, so you do not fight the validator:
- 2 to 32 characters.
- Lowercase letters, digits, and hyphens only. No spaces, no capitals, no underscores.
- No leading or trailing hyphen, and no doubled hyphens (so
my--teamis out). - It cannot be a reserved word. Things like
admin,api,blog,settings, andwwware held back because they collide with real routes.
One more that catches people: a slug stays reserved for a 30-day restore window after a workspace is deleted. So if you try a slug, it reads as taken, and you swear it is free, someone (possibly you, earlier) may have deleted a workspace on that address recently. Pick a different one.
When the slug is green, click "Create my team." The button reads "Setting things up…" while it works. Behind that, the createWorkspace action creates the workspace, makes you its owner, seeds a #general chat channel with a welcome message so the space is not empty, and writes an audit-log row recording that the workspace was born. You now own a real workspace.
Understand the 14-day Pro trial you just got
The moment you created that workspace, something happened worth being clear-eyed about. Utter granted it a 14-day Pro trial. In the data that is plan = pro, planStatus = trialing, and trialEndsAt set to 14 days out. It also stamped a flag on your user record, pro_trial_used_at.
That flag matters. The trial is granted once per user, and only on your first-ever workspace. Create a second workspace later and it starts on Free, not Pro. Deleting the trial workspace does not reset the flag, so you cannot recycle the trial by deleting and recreating. One trial per person, spent on your first workspace. This is why Utter's own copy says "your first workspace" and not "every new workspace." Saying otherwise would mislead you.
Now the part that actually reassures people. There is no card on file. You did not enter payment details, so nothing can auto-charge you when the trial ends. This is not a trial that quietly bills you on day 15. When the 14 days run out, the workspace simply drops to Free. That downgrade happens lazily, the moment someone next reads the workspace's plan through effectivePlan(), with a periodic worker sweep catching any that go dormant. No invoice. No "we tried your card." It becomes Free.
stateDiagram-v2
    [*] --> Trialing: first workspace created
    Trialing --> Free: 14 days pass, nothing charged
    Trialing --> Paid: you choose to upgrade
    Free --> Paid: you upgrade later
So what is Free? Concretely: 128 MB of storage, up to 5 active projects, and a small monthly AI grant. Here is the honest framing most tools blur. On Utter, capacity separates the tiers, not core features. Sprints, timeline, reporting, and integrations are all available on Free. What is reserved for paid plans is the enterprise-flavored stuff: automation rules, custom roles, SSO, and the audit log.
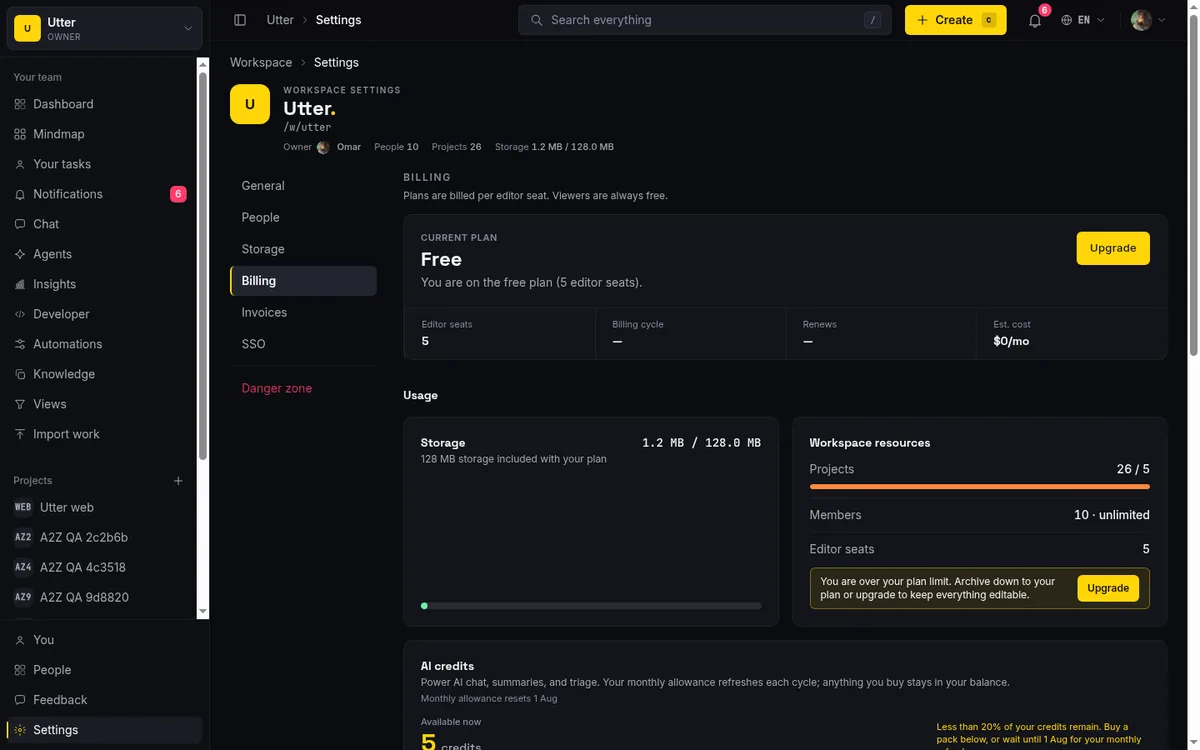
So the trial is not a two-week tease of features you will lose. It is more storage, more projects, and more AI headroom for two weeks. If you want the full picture of what each tier includes and how billing works once you decide to pay, how to manage billing and plans covers it.
Invite your team now or skip it
Right after the workspace is created, a modal appears. "Workspace created" at the top, "Invite your team" below, with a field to add teammates by email and a "Skip for now" button. You are not trapped here.
My advice: invite now if the people you work with are known and ready. Getting them in early means your first project has real assignees instead of a ghost town. Skip if you are still exploring, or if you want to shape a project or two before anyone else sees the space. Skipping costs you nothing.
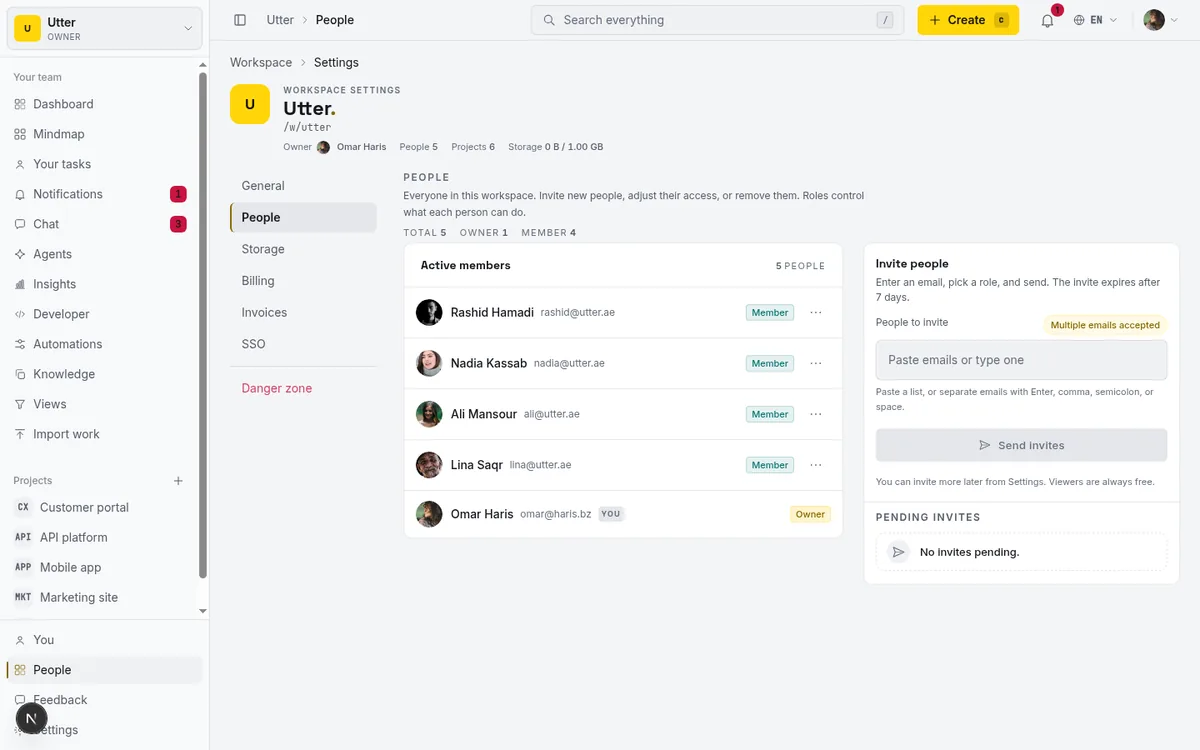
The same invite step also appears right after you create a project, and you can invite anyone later from the workspace. For the full flow, including roles and what invitees see, read how to invite team members.
Create your first project and pick a permanent issue key
Whether you invited people or skipped, you land in your workspace. Now for the second real object you will create: a project. Head to your projects list at /w/[workspace]/projects. A fresh workspace shows "Set up your first project" and a "+ Create your first project" button. Otherwise there is a "+ New project" button in the corner. Either way lands you on /projects/new.
The new-project form has a few parts, and the first is a choice. "Start from a template," with five options: Blank project, Software / Kanban, Bug tracker, Sprint / Scrum, and Marketing / Content.
Let me be straight about what a template actually does, because it is easy to over-imagine. A template pre-seeds the project: board columns, a starter set of labels, and a few sample issues so the board is not blank. That is it. It is best-effort and it never blocks project creation, so if something in the template seeding hiccups, you still get your project. Blank keeps the 7 default board columns and nothing else. If you are not sure, Software / Kanban is a sensible default for most teams.
Then the text fields:
- "Project name", say "Web app".
- "URL slug", which auto-derives from the name (
web) just like the workspace slug did. - "Issue key", auto-suggested from the name, which is the field that deserves the most thought.
- An optional "Description", plus "Start date" and "End date" pickers if you want the project to carry a timeline from day one. All optional.
Both the slug and the key get live availability checks against /api/projects/check, and the "Create project" button stays disabled while a value is still being checked or is already taken, so you cannot submit a colliding project. When everything is green, click "Create project" (it reads "Creating…") and, after the optional invite step, you land directly on your new project's board.
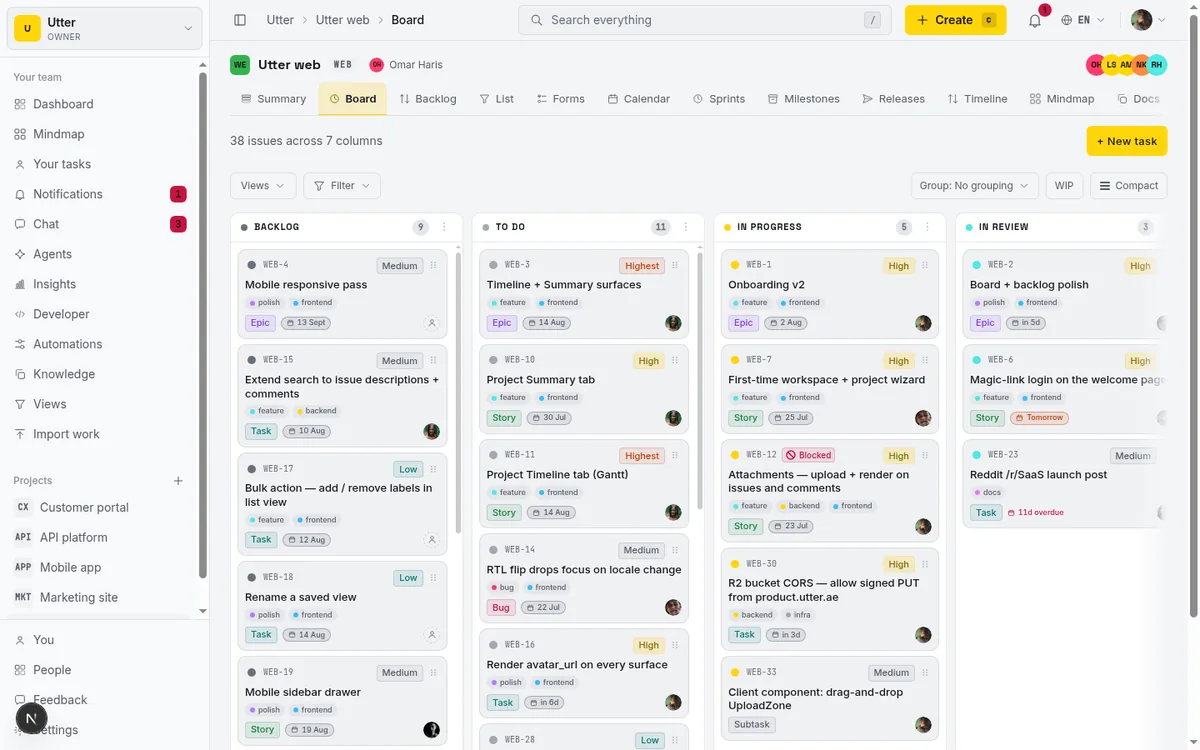
Here is the concrete picture of what you just made. Say you named the project "Web app" with the key WEB and picked Software / Kanban. Your board opens with columns like Backlog, To Do, In Progress, In Review, and Done. The template's sample issues sit in those columns, and a real ticket you add next, something like "Timeline + Summary tab", becomes WEB-12. That number just keeps counting up per project. That is the whole model: a project holds issues, each issue wears the project's key.
The real issue key rules (and why the key is forever)
The issue key gets its own section because the UI undersells the rules, and because you genuinely cannot change your mind later.
The hint on the field says "Permanent. 2-6 uppercase letters." That is not wrong, but it is narrower than what the code accepts. The real rule is this pattern:
// src/lib/projects/keys.ts
export const KEY_PATTERN = /^[A-Z][A-Z0-9]{1,5}$/;

// Valid:   WEB, WEB2, PF1, MKT
// Invalid: 2WEB (starts with a digit), W (too short), MY-APP (hyphen)
It must start with a letter, run 2 to 6 characters total, and after that first letter it can hold uppercase letters or digits, with no hyphens. The digit-friendly version helps when you have several related projects (WEB, WEB2) or a short brand code with a number in it.
Now the word "permanent," which is the part to take seriously. The key is baked into every issue's identity. Every ticket is KEY-NUMBER, forever: WEB-1, WEB-12, WEB-347. That string ends up in URLs, in comments where people write #WEB-12 to reference a ticket, in commit messages, in bookmarks, in the muscle memory of everyone on the team. You do not get to rename it later. And even after a project is archived, its key is never reusable, so you cannot free up "WEB" by archiving the old WEB project and starting fresh.
Choose a key you will not regret. Short, obvious, tied to the project's real name, stable enough that it still makes sense in a year. If the project is "Marketing site," MKT or WEB beats a clever inside joke you will have to explain to every new hire. Type it once, live with it always.
Once the board is open with your key in place, the natural next steps are how to create an issue to start filling those columns and how to use a kanban board to actually run work across them.
Where new projects live and how to add more
Your projects all live at /w/[workspace]/projects. That is home base. The "+ New project" button is always there, and when the list is empty you get the friendlier "Set up your first project" prompt with "+ Create your first project." Nothing hidden. One page, one button.
One number to keep in mind on Free: you can have 5 active projects. Try to create a sixth active project and the form does not throw a red field error at you. It shows an upgrade prompt, "Add more projects with a paid plan." A nudge, not a broken form. If you see it, nothing is wrong. You have reached the Free ceiling.
There is a useful escape hatch. Archiving a project frees up an active slot, so a team that runs projects in seasons (spin one up, finish it, archive it) can stay under 5 active without ever paying. Just remember the key stays reserved even after archiving.
And most small teams should resist the urge to make a project per tiny effort. A project is a body of work with its own board and its own key, not a folder for three tasks. Fewer, well-scoped projects beat a sprawl of near-empty ones, and it keeps you comfortably inside the Free cap.
Common first-run mistakes and how to avoid them
A short punch-list of what actually snags people on day one, all of it straight from how Utter really behaves:
- The magic link "stopped working." It expired. Links live 15 minutes and are single-use. Click "Send another link" on the check-your-inbox screen and use the fresh one. The old one staying dead is a feature.
- The slug reads as taken but you are sure it is free. Either it is a reserved word (
admin,api,blog,settings,www) or someone deleted a workspace on that slug in the last 30 days and it is still on hold. Pick another. - The onboarding form is gone and you see "Workspace limit reached." You already own 3 unpaid workspaces, which is the cap. Only workspaces you own and have not paid for count. Being a member of someone else's workspace does not count, and paid workspaces do not count. Upgrade one, or delete one you no longer need, and the form comes back.
- Worrying the trial will bill you. It will not. There is no card on file. An un-upgraded trial just becomes Free after 14 days.
- Picking a throwaway issue key. You cannot change it, ever, and it shows up in every ticket id. Slow down for that one field and pick something you will be happy to type a thousand times.
- Hitting "Add more projects with a paid plan" at project number six. That is the Free 5-active-project cap, not an error. Archive a finished project to reclaim a slot, or upgrade.
None of these are blockers once you know them, and now you do. The whole path, email to link to workspace to project, really is about five minutes of clicking, most of which is you deciding on a good name and a good key.
Ready to start? Open /login, enter your email, and create your first workspace.
Frequently asked questions
How do I get started with a project management tool that has no password?
On Utter you go to /login, type your email, and click "Email me a link." There is no password and no separate sign-up form. Clicking the emailed link signs you in, and if it is your first time it creates your account automatically.
Why is there no 'Sign up' or registration page?
Sign-in and sign-up are the same action. The first time you request a magic link for a new email, clicking that link creates your account. The login endpoint returns the same response for known and unknown emails (enumeration resistance), so you will never see a "no account found" error.
How long is the magic link valid?
Exactly 15 minutes, and it is single-use. If it expires, click "Send another link" on the check-your-inbox screen. A HEAD preview probe from an email client does not spend the token, so link previews will not burn it before you click.
What are the rules for a workspace slug?
2 to 32 characters, lowercase letters, digits, and hyphens only, with no leading, trailing, or doubled hyphens. It cannot be a reserved word like admin, api, blog, settings, or www. A slug also stays reserved for 30 days after a workspace is deleted, so a recently deleted one reads as taken.
Can I change a project's issue key later?
No. The key is permanent. Every issue is KEY-NUMBER (like WEB-12) forever, and the string lives in URLs, comments, and commit references. The key is also never reusable, even after you archive the project, so pick a short, obvious one you will not regret.
Does the 14-day Pro trial charge my card when it ends?
No. There is no card on file, so nothing can auto-charge you. When the 14 days end the workspace simply drops to Free (128 MB storage, 5 active projects, a small AI grant). The trial is granted once per user, only on your first workspace, and deleting that workspace does not reset it.
What actually differs between Free and paid plans?
Capacity, not core features. Sprints, timeline, reporting, and integrations are all on Free. Paid plans add capacity plus enterprise controls: automation rules, custom roles, SSO, and the audit log.
Why does my slug say 'Workspace limit reached'?
You already own 3 unpaid workspaces, which is the per-user cap. Only workspaces you own and have not paid for count toward it. Being a member of someone else's workspace does not count, and paid workspaces do not count. Upgrade or delete one and the onboarding form returns.
Related reading
How to use the rest api
Get an Utter API key and use the project management REST API to list, create, and update issues safely, with scopes, idempotency keys, and rate limits explained.
July 15, 2026 · 16 min read
How to set up sso and scim
Set up project management SSO, SAML, and SCIM in Utter from one settings tab: copy the right URLs into Okta or Azure AD, provision users, know the limits.
July 15, 2026 · 16 min read
How to manage roles and permissions
Learn how project management roles and permissions work in Utter: the five roles, inviting with the right access, scoped projects, and who pays for a seat.
July 15, 2026 · 18 min read
How to use webhooks
Set up outbound webhooks in Utter: create one, verify the HMAC signature (sha256-of-secret gotcha), handle at-most-once delivery, and pipe board events to Slack.
July 15, 2026 · 16 min read
Notifications and watching issues
Set up Utter notifications and watch issues: the four events that notify you, who gets pinged, inbox triage, snooze and archive, and email vs in-app.
July 15, 2026 · 16 min read
How to invite team members
Invite team members to an Utter workspace and set their roles: the five roles explained, guest project scoping, invite lifecycle, ownership transfer, and billing.
July 15, 2026 · 16 min read
What you can run in Utter without extra tools
A straight, capability-forward tour of the jobs Utter covers in its core, from a light help desk to integrations, estimation, and roadmaps, and when to pair a dedicated tool.
July 16, 2026 · 8 min read
How to manage your notification preferences
Manage project management notifications in Utter: read the Email vs In-app matrix, cut noise without going dark, watch issues, and control the weekly digest.
July 15, 2026 · 14 min read
How to set up a request form
Build a public intake form in Utter that creates tickets: map fields to issue title, description and priority, route submissions, publish a no-account link.
July 15, 2026 · 14 min read

How to use team chat
A practical guide to team chat in a project management tool: channels, DMs, threads, @mentions, file attachments, and the honest limits, all next to your issues.
July 15, 2026 · 16 min read
Add a comment
Start the conversation.