
Custom fields in issue tracking
You're writing up a bug. A real one, filed by a real customer, and halfway through you hit a wall: there's nowhere to put the thing that actually matters. Which browser it broke in. How bad it is. The link to the Figma frame the build was supposed to match. Title, assignee, status, priority, labels get you most of the way, but not all the way. That last mile is exactly what custom fields in an issue tracker are for, and this guide walks the whole thing from an empty Fields page to a triage view filtered down to your critical open bugs.
By the end you'll be able to:
- Create a project-scoped custom field and pick the right one of the 10 kinds.
- Add Select and Multi-select options, and scope a field to work types like Bug or Story.
- Make a field required, and know exactly when that requirement bites.
- Enter values on an issue, then surface them as List columns and filters.
- Understand the real limits: what you can't change, what can't be filtered, and what custom fields don't touch.
What custom fields are, and when you actually need one
Most work fits the built-in fields. A task has a title, an owner, a status, maybe a priority and a couple of labels. That covers the bulk of what any team tracks day to day. But every team hits the case those fields can't hold.
A QA engineer files a bug and wants to record the browser it happened in. A product manager writes a story and wants a Severity so triage isn't a guess. A designer wants the spec link sitting on the ticket instead of buried three comments down. None of that fits "assignee" or "priority." That's the gap. Custom fields let you capture that extra structured data, typed and consistent, on the issues that need it.
Here's the one concept to lock in before you click anything: in Utter, custom fields are project-scoped. Not workspace-wide. The WEB project defines its own set. Another project defines its own, separately. Build a great Severity field on WEB and want the same on a second project? You create it again over there. This trips people up, so hold onto it. No global fields. No field that follows you between projects.
If that sounds like Jira's field configurability, it is, roughly. The difference is weight. You get typed, per-project structure without the schema-migration ceremony. You define a field in a modal, and it's live.
One more distinction, because people reach for the wrong tool. Labels are loose tags. You slap them on freely, they're shared across the project, they're great for ad-hoc grouping like "needs-design" or "flaky" or "customer-reported." Custom fields are the opposite. Typed, structured, controlled. A Select field forces one of a fixed list. A Number field only takes numbers. If you want a free-for-all tag, use a label. If you want a value that's the same shape on every issue, use a custom field.
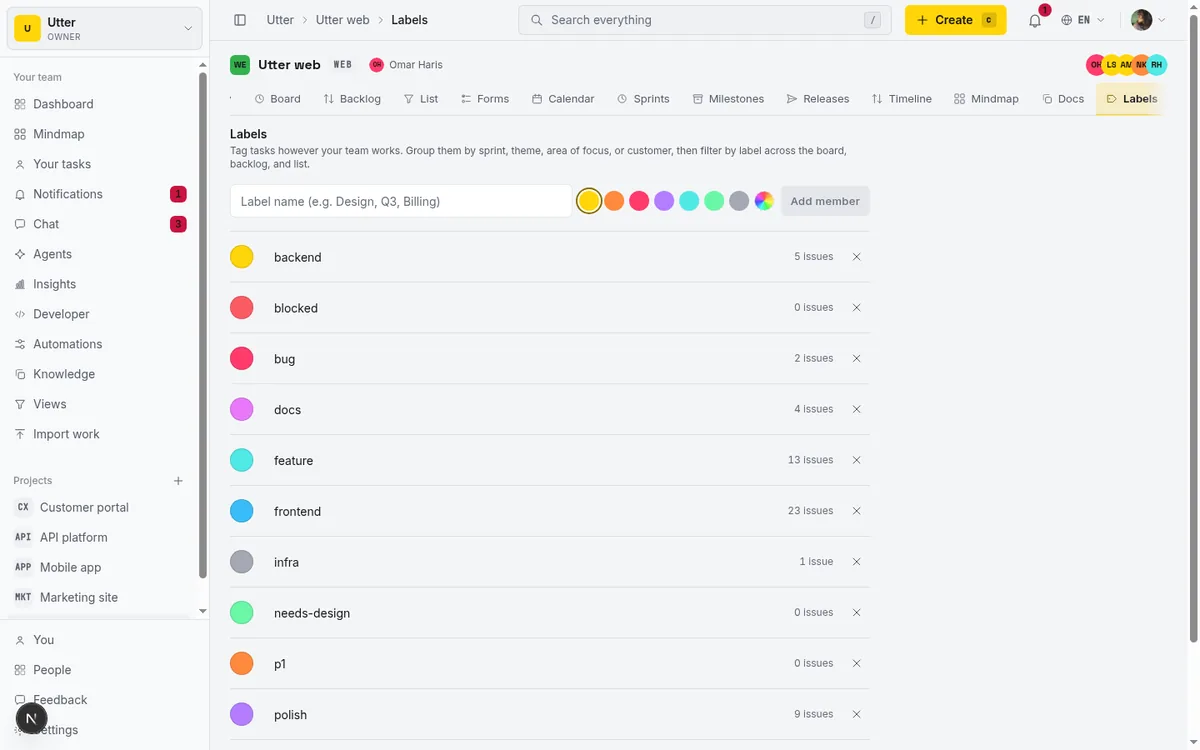
Open the Fields page for your project
Everything starts on the Fields page. Open your project (we'll use the demo WEB project throughout) and look at the top-level project tabs, the same row that holds Board, Backlog, and List. There's a tab labeled Fields. Click it. You land on the Custom fields page at /w/[ws]/p/[project]/fields.
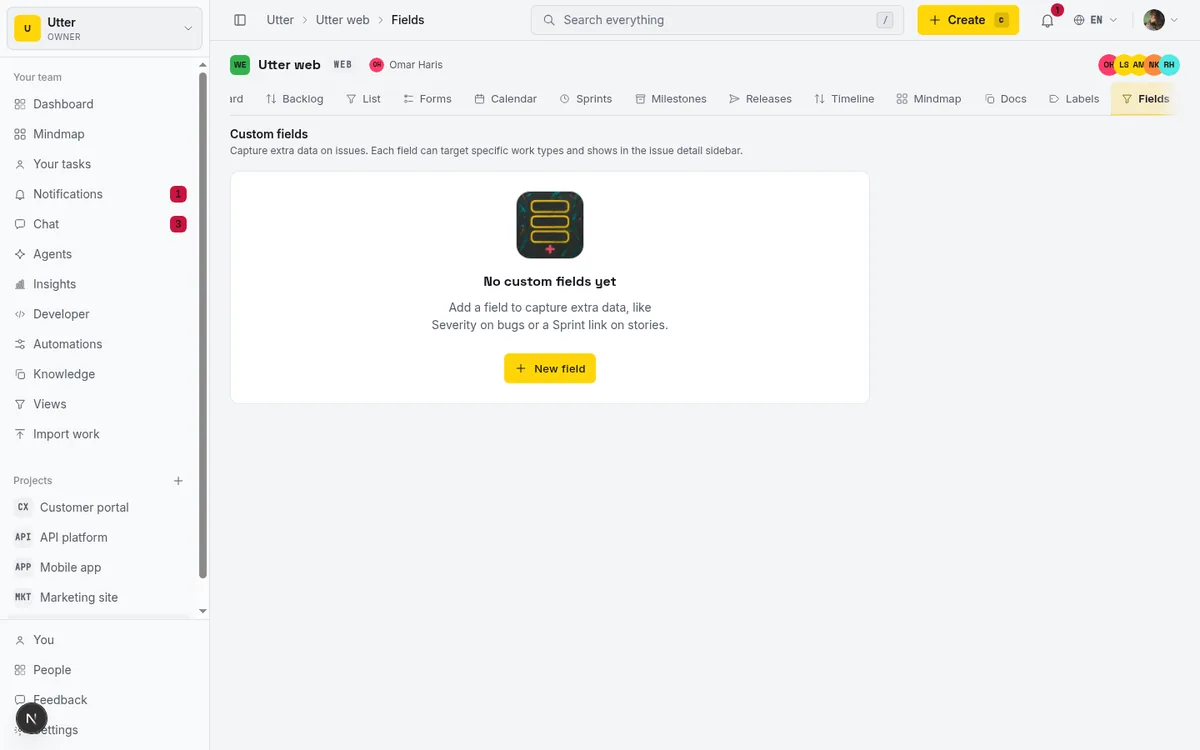
The page leads with the heading Custom fields and a subtitle that says what it's for: "Capture extra data on issues. Each field can target specific work types and shows in the issue detail sidebar." Top right, the New field button. Below, a table with four columns: Name, Type, Applies to, and Required. Each row is one field, with a drag handle and up/down chevrons for reordering. The Type column also shows the option count for Select and Multi-select fields, so you can see at a glance how many choices a picklist carries.
On a fresh project the table is empty and reads No custom fields yet, with a nudge: "Add a field to capture extra data, like Severity on bugs or a Sprint link on stories." That's your starting line.
Worth knowing who sees what. Creating and editing fields is gated behind the project.edit_settings permission, which owners and admins have. A plain member or a viewer without it sees the fields read-only, and on an unconfigured project gets "An admin hasn't configured any custom fields for this project." Guests don't see the Fields tab at all. So if a teammate says the tab is missing, it's almost always permissions, not a bug.
Create your first field and pick the right type
Click New field. The New custom field modal opens. It's small and does one job, but the decisions here matter more than the modal's size suggests.
First, Field name. The placeholder shows "e.g. Severity" and it caps at 80 characters. Name it for what it holds, in the language your team actually uses. "Severity." "Browser." "Spec link." Clear beats clever.
Then the important one: Type. It's a searchable combobox ("Search types..."), and it lists exactly 10 kinds. Here they all are, with what each is good for:
- Text (single line). Free text. Use it when the values are genuinely open-ended and you'll never want to filter by an exact set.
- Number. Finite numbers, bounded to plus or minus 1,000,000,000. Story points, a count, an estimate in a unit you care about.
- Select (one of a list). Pick one from a fixed set you define. The workhorse for controlled values.
- Multi-select (several of a list). Same, but multiple picks allowed.
- Date. A real calendar date (YYYY-MM-DD). A target date, a discovered-on date, whatever the built-in fields don't give you.
- Checkbox (yes / no). A simple boolean flag.
- URL. An external link, validated to start with http:// or https://.
- User (team member). Points at one person in the workspace. Good for an owner who isn't the assignee, like a reviewer or a QA lead.
- Project (link a project). References another project in the workspace.
- Doc (link a doc / page). References a doc or page.
That's the full set. User, Project, and Doc each hold a single reference, not many, so don't plan for a "two reviewers" field here.
How to choose. The recurring decision is Select versus Text. If the values come from a known, small vocabulary (Severity is S1/S2/S3/S4, Browser is Chrome/Firefox/Safari/Edge), use Select. It keeps the data clean, it filters, it colours nicely in the List. Only reach for Text when the value is truly free, like a one-off note.
Use User when you need a named person who isn't the assignee. Use URL for an external link rather than pasting it into the description where it gets lost. If you're unsure, this is the whole decision:
flowchart TD
    A[New field] --> B{Values come from a fixed list?}
    B -- yes, pick one --> C[Select]
    B -- yes, pick several --> D[Multi select]
    B -- no --> E{What shape is the value?}
    E -- a person --> F[User]
    E -- a link --> G[URL]
    E -- a number --> H[Number]
    E -- a date --> I[Date]
    E -- yes or no --> J[Checkbox]
    E -- another project or a doc --> K[Project or Doc]
    E -- anything else --> L[Text]
For our worked example, we'll build a Severity field on WEB, kind Select. Type the name, pick Select in the combobox.
Now the warning that earns its bold. Type is locked after creation. The modal says it plainly: "Type can't change after creation." You cannot turn a Text field into a Select later, or a Number into a Date. Get the type wrong and your only fix is to delete the field and rebuild it, which means any values already entered are gone. So decide the type deliberately before you hit Add field. This is the single most common mistake people make with custom fields, and it's fully avoidable by thinking for ten seconds about how you'll filter and report on the value first.
Add options for Select and Multi-select fields
The moment you pick Select or Multi-select, the Options editor appears in the modal. For any other kind it isn't there. It has no reason to be.
Adding options is direct. Type one into the box ("Type an option and press Enter"), then press Enter or click Add. Each option becomes a chip with a little × to remove it. Keep going until the list is complete.
For our Severity field, add four: S1, S2, S3, S4. Four chips, in order. Done.
The editor enforces a few rules so you don't fight it. Options are trimmed (leading and trailing whitespace stripped) and de-duplicated (add "S1" twice, you get one). You can have up to 50, and each caps at 80 characters. And you must have at least one. A Select with no options is meaningless, so submitting an empty one returns "Add at least one option for a select field."
Now the honest limit, because it surprises people. Options carry no stored colour. You don't pick the colour of the S1 chip. When Select values show up as coloured chips in the List view or the filter panel, those colours are derived deterministically from the option's position in the list, not chosen by you. No per-option colour picker. No default value either: an issue starts with the field empty and stays empty until someone sets it. If you were hoping to make S1 red and S4 grey by hand, you can't. The colour is consistent, just not yours to assign.
Scope a field to the right work types
Below the options is Show on work types, a row of toggle chips: Epic, Story, Task, Bug, Subtask. This is how you keep a field off issues it has no business being on.
The rule is simple. Toggle the types the field should appear on. Select none and the field applies to all types (the hint reads "(none = all types)"). Select some and it shows only on those.
The payoff is real. Severity only makes sense on a Bug. It's noise on an Epic. So scope our Severity field to Bug only. Now when someone opens a Story, Severity isn't there taking up sidebar space and nudging them to think every story needs one. It shows up exactly where it belongs.
Mechanically this drives two surfaces. The new-issue dialog and the issue detail sidebar only render a field when its "applies to" is empty (all types) or includes that specific issue's type. So a Bug-scoped field appears on bugs and nowhere else, in both the create flow and the open issue.
Another example: a "Story points" style Number field. Scope it to Story and Task, so estimates show up on the work you actually estimate and stay off epics and subtasks.
Make a field required (and know when it's enforced)
The last control in the modal is the Required toggle. Its label spells out the contract: "Must be filled in before a matching issue can be created."
Here's precisely where it bites, because "required" is only as useful as knowing when it's checked. Two places.
- The create-issue dialog. Create a new issue whose type matches the field's scope, and a required field blocks submit until it's filled. You'll see
"{name}" is required.on the field and a summary like "Fill the required fields: {names}." If Severity is required on Bugs, you cannot file a bug on WEB without setting a severity. That's the point. - Server-side. It's not just front-end polish. A required field can't be cleared back to null. The server rejects that in
setFieldValue. So nobody blanks it out later through a side door.
Now the catch, and people assume it the wrong way around. There is no bulk backfill. Turn on Required for a field that already exists and it does not go back and force every old issue to suddenly have a value. It applies forward: to new matching issues at create time, and to future attempts to clear the field. Your two hundred existing bugs without a severity stay exactly as they are. If you need them filled, that's a manual pass, one issue at a time.
Practical advice: don't require everything. It's tempting to enforce discipline by making five fields mandatory, and then every bug report becomes a form-filling chore. People resent it, or they route around it with vaguer titles and issues filed elsewhere. Require the one or two fields that genuinely must be there. Leave the rest optional.
Enter custom-field values on an issue
Fields defined, now put data in them. Open any issue and look at the detail sidebar. There's a Project fields section (the CustomFieldsCard) listing every field that applies to this issue's type. Take a real WEB ticket, something like "Timeline + Summary tab" on the board. Open it, and if that ticket's type matches your fields, they're right there in the rail.
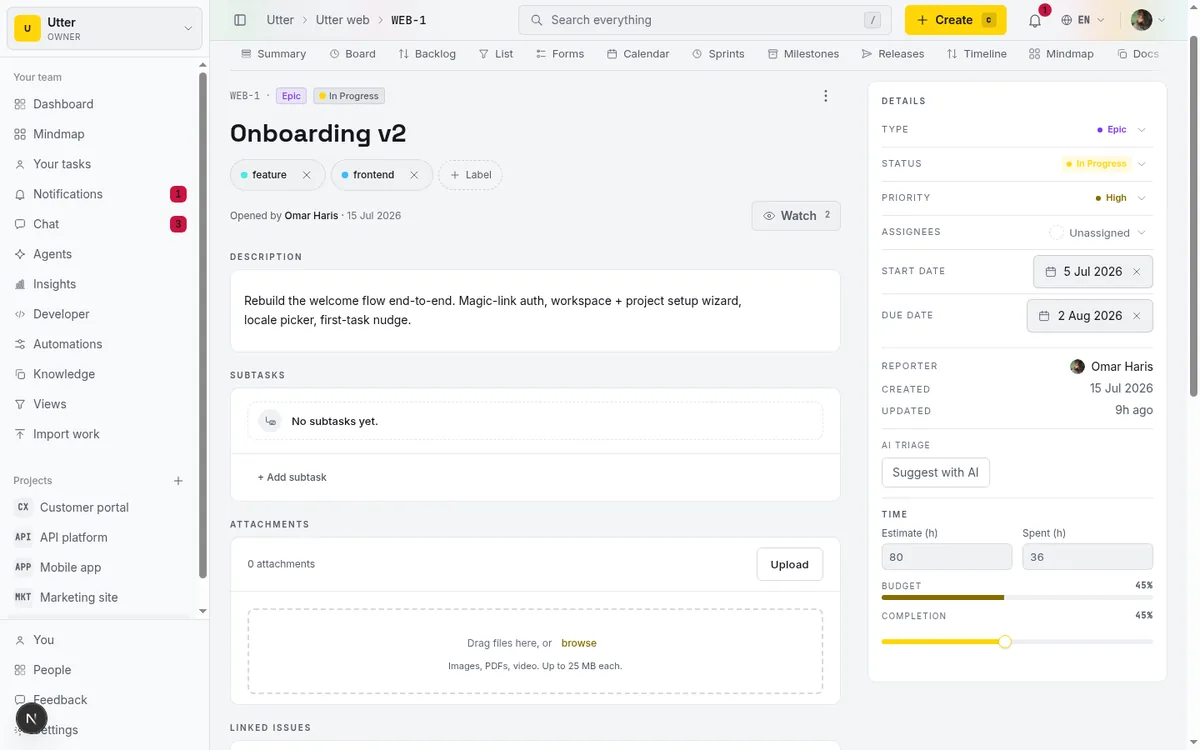
The input matches the kind, which is the whole reason typed fields beat free text:
- Select / User / Project / Doc: a Combobox. Search and pick one. Project and Doc show an Open link next to the value so you can jump to the referenced item.
- Multi-select: chip toggles. Click to add and remove several.
- Checkbox: a Switch. On or off.
- Date: a DatePicker.
- Number / Text / URL: the matching input.
Required fields are marked so there's no guessing which ones the create flow will insist on.
Everything you enter is validated and coerced server-side to the field's kind. This is not decoration. A URL must start with http:// or https:// or it's rejected. A Number must be finite and within plus or minus 1,000,000,000. A Date must be a real YYYY-MM-DD. A Select value must match one of the options you defined. A User, Project, or Doc must resolve to an actual member, project, or doc in the workspace. You can't stuff a Select with a value that isn't in its list, and you can't sneak a bad date past it. The data stays the shape you designed.
One permission note that catches people. Setting a value on an issue uses the same permission as editing the issue itself, not the field-settings permission. So issue.edit_own for your own issues, issue.edit_any otherwise. Anyone who can edit a ticket can fill its custom fields. You don't need to be an admin to set Severity on a bug you're working. You just need to be able to edit that bug.
If you want the fuller picture of where required fields stop you during creation, how to create an issue walks through the new-issue flow, which is where a required custom field first blocks submit.
Show custom fields as columns in the List view
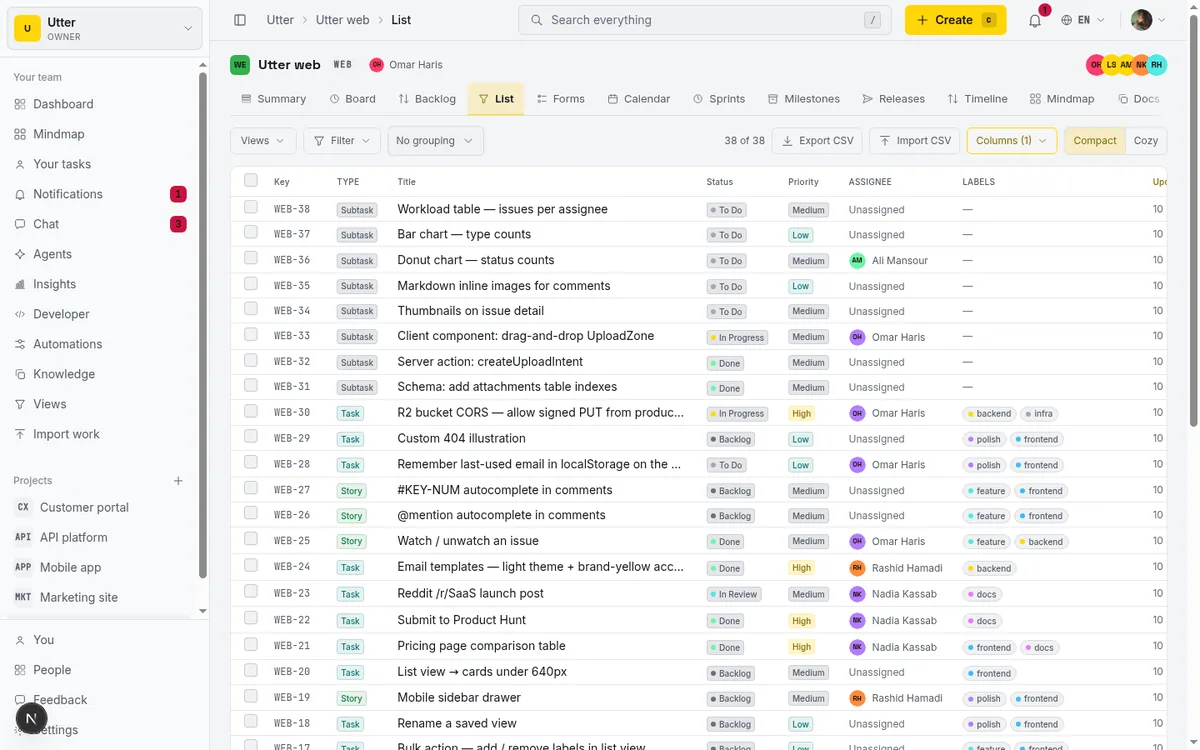
The sidebar is fine for one issue at a time. The real leverage shows up when you can see a field across a whole list of issues. Switch to the List view and open the Columns menu.
Your custom fields appear in that menu below the base columns (title, status, assignee, and the rest). Toggle the ones you want on and they become columns in the table. Because visible columns persist in the ?cols= URL parameter, the view is shareable: turn on Severity and Browser, copy the URL, send it to a teammate, and they see the same columns. A clean way to hand someone "all the open bugs with their severity" without them rebuilding the view.
The cells render aware of their kind, so the table stays readable:
- Select / Multi-select: coloured option chips.
- Checkbox: a check icon when true.
- Date: formatted, not a raw string.
- Number: tabular, aligned for scanning.
- URL: a clickable host link.
- User: an avatar plus name.
The honest limit here: custom-field values live in two places, the issue detail sidebar and these opt-in List columns. They are not shown on the Kanban board cards. The board stays lean with its title, assignee, and priority.
flowchart LR
    V[Custom field value] --> S[Issue detail sidebar]
    V --> C[List columns]
    V --> F[Fields filter]
    V --> A[REST API]
    V -. never shown .-> B[Board cards]
If you want to see Severity across your work at a glance, the List view is where you do it, not the board. Plan around that, because teams that live on the board sometimes expect the custom field to ride along on the card, and it doesn't.
Once you've got columns, arranging and sorting the list is its own small skill. How to filter and sort issues covers the view controls in depth.
Filter issues by a custom field
Columns let you see the values. Filtering lets you narrow to the ones that matter. In List view, find the Fields filter pill (it has a slider icon) and open it. You get a panel with one control per filterable field, each fit to the kind:
- Select / Multi-select: option chips. Click the ones you want to match.
- User: member rows.
- Checkbox: an Any / Checked / Unchecked toggle.
- Number: a Min and Max range.
- Date: a From and To range.
- Text / URL: a "Contains..." box, a substring match.
The pill shows an active-count badge so you can tell at a glance how many field filters are on, and Clear resets them. Active field filters persist in the URL too, one cf.<fieldId> parameter per field, so a filtered view is as shareable as a column setup.
Worked example, the payoff for everything so far. On WEB, filter to Severity = S1 and keep the built-in open filter on. Now you're looking at exactly your critical open bugs, nothing else. That's the triage list you actually wanted, and it took two clicks because you made Severity a typed Select instead of a note in the description.
The honest limit: the Fields filter does not support Project or Doc kinds. The filterable set is text, url, number, select, multi-select, date, checkbox, and user. Build a "Related project" field and you can see it as a column, but you can't filter the list by it. Also note that Text and URL both filter as a "Contains..." substring, not an exact match. Usually what you want anyway, but worth knowing when a partial string pulls in more than you expected.
Edit, reorder, and delete fields later
Fields aren't set in stone (except the one thing that is). Back on the Fields page table, you manage everything in place.
Rename a field by editing its Name inline. Enter saves, Escape cancels. Change what it applies to through a popover on the "Applies to" cell. Toggle Required by clicking the badge in the Required column. For the fuller edit (Name, Options for Select kinds, Applies-to, and Required at once) click the pencil to open the Edit field modal. One thing stays greyed out there: Type. Still locked, still "Type can't change after creation." Everything else is fair game.
Reorder fields with the drag handle or the up/down chevrons. Order matters. It's stored as a LexoRank rank and controls the order fields appear in, both in the issue sidebar and in the create dialog. So put the field people fill most at the top. Reordering is optimistic (it moves instantly) and persists through reorderFieldDef, so what you see is what sticks.
Delete a field with the × on its row, which pops a confirm dialog. Here's the honest bit. Delete is a soft-delete under the hood (it sets a deletedAt), so the field stops showing everywhere. But the UI does not present this as an undo or restore flow. There's no "recently deleted fields" bin to click and bring it back. Treat delete as permanent. If you're not sure, don't delete. Unscope the field instead (remove all its work types) or leave it be.
Script fields over the REST API
Everything above is also exposed over the public v1 REST API, with the same option normalisation and value coercion as the in-app actions. If you're scripting issue creation or syncing from another system, your custom fields and their validation come along. They're not an in-app-only convenience.
Definitions live under the project. Creating our Severity field from the command line looks like this (the API spells the kinds with underscores, so Multi-select is multi_select):
curl -X POST "https://utter.ae/api/v1/workspaces/utter/projects/WEB/custom-field-defs" \
  -H "Authorization: Bearer utp_live_a1b2..." \
  -H "Content-Type: application/json" \
  -d '{
    "name": "Severity",
    "kind": "select",
    "options": ["S1", "S2", "S3", "S4"],
    "applies_to": ["bug"],
    "required": true
  }'
const res = await fetch(
"https://utter.ae/api/v1/workspaces/utter/projects/WEB/custom-field-defs",
{
method: "POST",
headers: {
Authorization: "Bearer utp_live_a1b2...",
"Content-Type": "application/json",
},
body: JSON.stringify({
name: "Severity",
kind: "select",
options: ["S1", "S2", "S3", "S4"],
applies_to: ["bug"],
required: true,
}),
},
);
const field = await res.json();import requests
res = requests.post(
"https://utter.ae/api/v1/workspaces/utter/projects/WEB/custom-field-defs",
headers={"Authorization": "Bearer utp_live_a1b2..."},
json={
"name": "Severity",
"kind": "select",
"options": ["S1", "S2", "S3", "S4"],
"applies_to": ["bug"],
"required": True,
},
)
field = res.json()A successful create returns 201 with the new definition, including the id you'll use to set values:
{
  "id": "0198f3a2-7c11-7e02-b3d4-9a8e5f6c1d2e",
  "name": "Severity",
  "kind": "select",
  "options": ["S1", "S2", "S3", "S4"],
  "applies_to": ["bug"],
  "required": true,
  "rank": "n"
}
Setting a value on an issue is a PUT against the issue, with the field id in the path. A null value clears the field, and the API refuses to clear a required one, exactly like the app:
curl -X PUT "https://utter.ae/api/v1/workspaces/utter/projects/WEB/issues/WEB-12/custom-fields/0198f3a2-7c11-7e02-b3d4-9a8e5f6c1d2e" \
  -H "Authorization: Bearer utp_live_a1b2..." \
  -H "Content-Type: application/json" \
  -d '{"value": "S1"}'
The permission model mirrors the app. Reading needs a key with the custom_fields:read scope, writing needs custom_fields:write. Managing definitions (create, edit, delete) additionally requires the key's owner to be a project-settings admin, the same project.edit_settings gate as the Fields page. Setting a value on an issue only needs the ability to edit that issue. Duplicate names are rejected with a conflict, and a select or multi_select definition without options is rejected outright. For the wider API picture, how to use the REST API covers keys, scopes, and error shapes.
Common mistakes and how to avoid them
A short list of the ways people trip over custom fields, all drawn straight from the limits above.
Picking the wrong Type. It can't change after creation, so a Text field you meant to make a Select is a rebuild, not an edit. Decide before you click Add field. Think about how you'll filter and report on the value first, then pick the type that supports it.
Over-requiring. Every required field is a gate on issue creation. Require five and filing a bug becomes a chore people route around. Require the one or two that truly must be there.
Expecting a workspace-wide field. They're per-project. If three projects all need Severity, you build Severity three times. There is no global field. Annoying at setup, but it's the model.
Trying to filter by Project or Doc fields. Unsupported. Those two kinds show as columns and in the sidebar, but the Fields filter won't touch them. If filtering matters, model the value a different way, maybe a Select.
Expecting fields on board cards. They live in the sidebar and opt-in List columns only. The board card won't show them. Use the List view for at-a-glance custom-field scanning.
Inventing kinds that don't exist. There are exactly 10: text, number, select, multi-select, date, checkbox, url, user, project, doc. No currency, no rating, no formula, no email, no phone, no multi-user reference. Model money as a Number, a rating as a Select of 1 to 5, an email as Text or URL. Don't hunt for a kind that isn't there.
One more thing as you scale. Fields like Severity and priority are only useful if they're accurate, and keeping hundreds of issues correctly tagged by hand is where discipline slips. If you're triaging at volume, AI issue triage that assigns and prioritizes is worth a look for keeping those values honest without a human touching every ticket.
Custom fields look small in the modal and change how a team tracks work once they're in place. Pick your types deliberately, scope them tight, require sparingly, and your issues will hold exactly the data you need and nothing you don't. Open the Fields tab on your project and build the first one.
Frequently asked questions
Where do I add custom fields in Utter?
On the Fields page of a project, at /w/[ws]/p/[project]/fields. Open your project, click the Fields tab in the top-level project tabs, and use the New field button. You need the project.edit_settings permission (owner or admin) to create or edit fields; without it you see them read-only, and guests don't see the tab.
Are custom fields shared across the whole workspace or just one project?
Just one project. Custom fields are project-scoped. Each project defines its own, and there is no shared or global custom field across projects. If you want the same field on another project, you create it there separately.
What custom field types can I choose from?
Exactly 10: Text (single line), Number, Select (one of a list), Multi-select (several of a list), Date, Checkbox (yes/no), URL, User (a team member), Project (link a project), and Doc (link a doc or page). User, Project, and Doc are single-value references, not multi-value.
Can I change a custom field's type after I create it?
No. Type is locked after creation, and the modal says so directly ("Type can't change after creation."). You can edit the Name, the Options (for Select kinds), the work types it applies to, and whether it's Required, but not the type. If you picked wrong, you delete the field and rebuild it.
How do I make a custom field required, and does it apply to existing issues?
Turn on the Required toggle when you create or edit the field. It's enforced in two places: the create-issue dialog blocks submitting a matching new issue until the field is filled, and the server refuses to clear a required field back to empty. But there's no bulk backfill. Making an existing field required does not retroactively force old issues to have a value; it only applies to new matching issues and to future clears.
How do I show a custom field as a column or filter my issues by it?
In the List view, open the Columns menu and toggle the field on to add it as a column (the view persists in the ?cols= URL, so it's shareable). To filter, open the Fields pill (slider icon) and use the per-field control: option chips, a range, a Contains box, and so on. An active-count badge shows how many field filters are on, and Clear resets them.
Can I filter by a Project or Doc custom field?
No. The Fields filter does not support Project or Doc kinds. Filterable kinds are text, url, number, select, multi-select, date, checkbox, and user. Project and Doc fields still appear as List columns and in the issue sidebar; you just can't filter the list by them.
What happens when I delete a custom field?
Deleting pops a confirm dialog, then the field stops showing everywhere. Under the hood it's a soft-delete, but the interface does not offer a restore or undo flow, so treat delete as permanent. If you're unsure, remove the field's work-type scope instead of deleting it.
Related reading

How to create an issue
Learn how to create an issue in Utter three ways, pick the right type, fill the dialog, roll up to an epic, and make subtasks. With the real limits named.
July 15, 2026 · 16 min read
How to use labels
Create, apply, and filter labels in Utter to organize and slice issues by theme, timing, or customer across the board, backlog, list, and timeline.
July 15, 2026 · 16 min read

How to filter and sort issues
Filter issues by assignee, label, and status in Utter's list view, then sort, group, save a view, and share the exact filtered list as a URL.
July 15, 2026 · 16 min read
How to set up a request form
Build a public intake form in Utter that creates tickets: map fields to issue title, description and priority, route submissions, publish a no-account link.
July 15, 2026 · 14 min read

How to track time on issues
How to track time on issues in Utter: set estimates and spent hours, read the budget bar, set completion, and roll it all up on the project summary.
July 15, 2026 · 14 min read
How to use a kanban board: a complete guide with a real example
Learn how to use a kanban board in Utter: read cards, drag tasks between columns, add and reorder custom columns, set WIP limits, filter, and save views.
July 15, 2026 · 20 min read

How to search your workspace
Search issues across projects in Utter from one top-bar field: the / shortcut, live typeahead, WEB-12 key-jump, the full results page with Type/Status/Priority filters, and the real limits.
July 15, 2026 · 14 min read
How to bulk edit issues
How to bulk-edit issues from Utter's List view: multi-select, bulk status/priority, unassign, archive, and human-in-the-loop AI triage, plus the real limits.
July 15, 2026 · 14 min read
A bug tracking workflow that runs from report to fix
Bug tracking workflow that runs report to fix in one tool: public intake form, AI triage, a board review gate, GitHub commit links, and auto-shipped releases.
July 16, 2026 · 12 min read
Custom workflow statuses
Build custom Jira-style board columns in Utter and enforce status transition rules across the board, API, bulk edits, and automations. With the honest limits.
July 15, 2026 · 18 min read
أضف تعليقًا
ابدأ النقاش.