
How to connect github
You just pushed a fix for WEB-42, and you want that commit to show up on the ticket. Not in Slack. Not buried in a branch nobody remembers to open. Right there on the issue, so the next person reading it can jump straight to the code without pinging you to ask where it lives. That is the whole reason to connect GitHub to your project management tool: turning "trust me, it's fixed" into a link someone can actually click.
This guide walks through doing exactly that in Utter. By the end you will have a GitHub repo wired to a project, commit messages that auto-link to the right issues, and a linked-commits list you can read from the issue page or pull through the REST API. You will also know precisely what does not link, so you never waste an afternoon filing a bug for behavior that was never built.
What connecting GitHub to your project management tool actually does
Get the mental model right before you click anything. It saves you from expecting the wrong thing later.
When you connect GitHub to your project management tool in Utter, you are setting up inbound-only commit linking, per project. That is the entire feature, and the narrowness is deliberate.
Here is the flow. You push to GitHub. GitHub sends Utter a webhook. For each commit in that push, Utter reads the commit message, finds any issue keys in it, and drops a linked-commit entry onto the matching issue in the one project you connected. Done.
sequenceDiagram
  participant Dev as You
  participant GH as GitHub
  participant UT as Utter
  Dev->>GH: git push
  GH->>UT: POST webhook with push payload
  UT->>UT: verify HMAC signature
  UT->>UT: scan commit messages for issue keys
  UT->>UT: link commits to matching issues
Utter does not push status back to GitHub. It does not comment on your commits or your PRs. It does not create branches, and it does not call the GitHub API to fetch anything about your repo.
Why care that it only flows one way? Because it means you get a trail in both directions (issue to code, code to issue) without ever handing Utter write access to your source. No OAuth GitHub App to install. No broad permission grant. No bot account that can push to main. It is a plain repo webhook you configure by hand, and Utter only ever receives, verifies, and reads text. If that sounds unglamorous, good. Unglamorous is what you want holding a thread to your codebase.
File one more fact away now: connection is per project, and a single repo can connect to several projects. Run a monorepo? Link it to your WEB project, your API project, and your MOBILE project separately. Each gets its own integration record and its own webhook secret. A commit only lands on an issue if that issue lives in the project whose integration received the push.
Open the Integrations tab in Project Settings
Everything starts in one place. Go to the project you want to link (we will use the demo WEB project throughout), open Settings, and click the Integrations tab. The direct path is /w/[ws]/p/[proj]/settings?tab=integrations.
You will see a GitHub card headed "Auto-link commits to this project's issues." Below it, one line explains the mechanism: push commits with #KEY-NUM in the message and they show up on the issue page. Under that sits a Repository field with an owner/name placeholder and a "Format: owner/name" hint, plus a Register repository button.
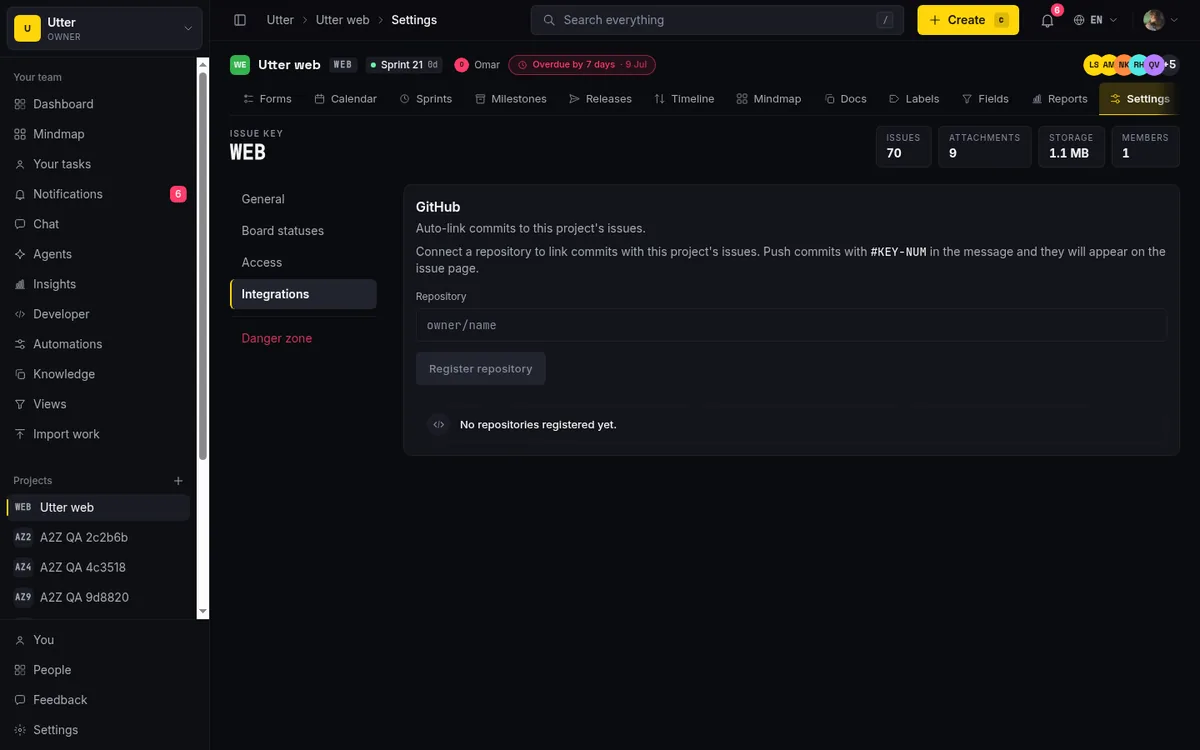
Two things worth stressing before you type anything. First, this is per project by design. Registering the repo on this card links commits to WEB's issues only. It does not connect the repo to the whole workspace, and it leaves your other projects untouched. Want the same repo feeding another project? Register it there too, separately.
Second, you need the project.edit_settings permission to do this. A project member without settings rights will not see the register button at all. And registering is not silent: it writes an audit_log entry, so there is a record of who connected what and when. Revoking later does the same. That trail matters more than it looks, because a webhook is a door that accepts pushes from outside, and you want to know who opened it.
Register the repo and grab the one-time webhook secret
Type your repository as owner/name. For the demo, something like your-org/web. Click Register repository. The button flips to "Registering..." for a beat, then the screen changes.
Utter generates a fresh webhook secret and shows you a panel headed "Save this secret in GitHub now." Every value you are about to paste into GitHub is right here:
| Field in GitHub | Value from Utter |
|---|---|
| Payload URL | https://utter.ae/api/integrations/github/webhook |
| Content type | application/json |
| Secret | the generated secret (copy button next to it) |
| Events | "Just the push event." |
Copy that secret now. I mean now, before you navigate away or a Slack ping steals your attention.
Here is the part that bites people. The secret is shown exactly once. Utter stores it encrypted at rest with AES-256-GCM and can never read it back to you. There is no "reveal secret" button. There is no "rotate" button. The panel says it plainly: "This secret is shown once. If you lose it, revoke this repository and register it again." That is not a nudge, it is the only recovery path. Lose the secret before it reaches GitHub and your fix is to revoke the repo and register fresh, which mints a brand new secret and means redoing the GitHub side.
So the discipline is simple. Register, copy the secret, keep this tab open, and go set up the GitHub side in another tab before you touch anything here. Do not close the panel until GitHub is done and pinging green.
Paste the webhook into GitHub (Utter cannot do it for you)
This half is manual, and there is no way around it. Utter has no GitHub App install flow, so it cannot reach into your repo and create the webhook itself. You paste the values by hand. That is the same security tradeoff in a different coat: the price of Utter never holding write access to your repo is that you do the plumbing.
In GitHub, open the repository, go to Settings, then Webhooks, then Add webhook. Fill it in:
- Payload URL: paste the
https://utter.ae/api/integrations/github/webhookvalue from Utter. - Content type: set it to
application/json. Not the default form-encoded option. The JSON one. - Secret: paste the secret you copied.
- Which events would you like to trigger this webhook?: choose "Just the push event."
Save it.
What happens on Utter's side when a delivery arrives is the reason that secret exists at all. Every webhook GitHub sends carries an X-Hub-Signature-256 header, an HMAC-SHA256 of the payload signed with your secret. Utter recomputes that signature using the stored secret and compares the two. If they do not match, or the header is missing, Utter does nothing. No commit linked, no visible effect in the app. So if you fat-fingered the secret, the symptom is not a loud failure inside Utter, it is commits quietly not appearing. That is the first thing to re-check when linking seems dead, and GitHub's own delivery log (more on it below) is where the mismatch shows up as a non-green response.
Two useful confirmations. GitHub fires a ping event the moment you add a webhook, and Utter answers it with a pong, so a green tick on that first delivery in GitHub's UI means the endpoint is reachable and responding. And any event other than push or release just returns HTTP 202 and gets ignored, so you cannot break anything by leaving extra events selected. They simply do nothing.
If webhooks in general are new to you, the webhooks explainer covers what they are and how signature verification protects you.
Write commit messages that link (the #KEY-NUM rules)
The wiring is done. Now the daily skill: writing commit messages that actually link. Most of the value lives here, and the rules are specific, so learn them once and they turn into muscle memory.
There are exactly two accepted forms.
Form one: #KEY-NUM anywhere in the message. Put a hash in front of the issue key and it links no matter where it sits.
Form two: a bare KEY-NUM, but only at the very start of the message. No hash needed, as long as the key is the first thing in the message, followed by a :, a -, whitespace, or the end of the line.
In real commits, both look like this:
git commit -m "Fix summary tab crash #WEB-42"
git commit -m "#WEB-42 fix the summary tab crash"
git commit -m "WEB-12: add Timeline + Summary tab"
git commit -m "WEB-42 wire up backlog ranking"
The keys themselves must be uppercase, 2 to 6 characters, matching the pattern [A-Z][A-Z0-9]{1,5}. Case is not forgiving, and position matters for the bare form. Here is what that means in practice:
| Commit message | Links? | Why |
|---|---|---|
WEB-12 wire up backlog ranking |
Yes | Bare key, at the start |
web-12 wire up backlog ranking |
No | Lowercase, ignored |
refactored web-12 handler |
No | Mid-message bare key, and lowercase on top |
refactored #WEB-12 handler |
Yes | The hash rescues a mid-message reference |
That last pair trips people constantly. Bare keys only fire at the start. The moment your reference sits in the middle of a sentence, you need the #. The whole decision fits in one picture:
flowchart TD
  A[Issue key in a commit message] --> B{Starts with a hash?}
  B -- yes --> C[Links anywhere in the message]
  B -- no --> D{Very first thing in the message?}
  D -- yes --> E[Links]
  D -- no --> F[Ignored]
When in doubt, always write #WEB-12. It works everywhere, and there is no downside.
The reference also has to resolve to a real, existing issue in the connected project. A #WEB-9999 that does not exist is silently skipped, no error. And one commit can reference several issues at once: Fix shared date parser #WEB-12 #WEB-42 lands on both tickets. Genuinely handy when a single change closes two things.
If issue keys and how they are formed are still fuzzy, how to create an issue covers the KEY-NUM structure from the ground up.
See linked commits on the issue
Here is the payoff. Push a commit that references WEB-12, then open that issue.
On the issue detail page there is a Linked commits section. Each row shows:
- The 7-character short SHA as a button. Click it and you deep-link straight to that commit on GitHub, which is the whole reason you did any of this.
- The commit message (the first line, truncated at 1000 characters if you write essays in your commits).
- The author name from the push payload, or "unknown" if the payload did not carry one.
- The commit date.
- The repo name (the full
owner/name).
The same event also lands in the issue's Activity timeline as a "linked a commit" entry, carrying the same 7-char SHA deep-link and the repo name. So you get it in two places: the Linked commits section for the current state, and the activity feed for the chronological story of the issue.
Two honest details. The author is the commit author's name and email straight from GitHub's push payload. It is not mapped to a workspace member, so do not expect an Utter avatar or a clickable profile there, even when the committer is in your workspace. It is display text, nothing more. And the section caps at 50 rows on the issue page. If an issue somehow piles up more than fifty linked commits, you are looking at the first fifty, and at that point the REST API (below) is the better tool.
One thing you do not have to worry about: duplicates. Linking is idempotent. A unique index on the combination of issue, repo, and SHA means that if GitHub redelivers a webhook (which it does sometimes, when it thinks a delivery failed), you do not get the same commit twice. Push the same commit through twice and you still see one row.
Manage or disconnect a connected repo
Below the register form sits the list of repositories already connected to this project. Each row is plain: the repo in monospace, "Registered {date}", and a Revoke button. When nothing is connected yet, the list reads "No repositories registered yet."
Revoking is how you disconnect. Click Revoke and you get a confirm prompt: "Stop accepting webhooks from {repo}?" Confirm it and Utter deletes the integration. Pushes from that repo stop linking commits from that moment.
The commits already linked stay put on their issues. Revoking does not scrub history, it just stops new links from forming. Like registering, revoking writes an audit_log entry and needs project.edit_settings. You can register the repo again later, and you get a fresh secret when you do, so you will re-enter the secret on the GitHub side (you can reuse the same GitHub webhook and just update its secret field).
Now the honest limitation. There is no last-delivery or webhook-activity indicator in this UI. The list shows the repo name and the registered date, and that is all. A last_webhook_at column was considered and deferred, so you cannot glance here to see "last push received 3 minutes ago." To confirm deliveries are actually arriving and verifying, check GitHub's own webhook delivery log (Settings, Webhooks, your webhook, Recent Deliveries), where each delivery shows its response code. Green there, plus a linked commit on the issue, is your proof the loop is closed.
Pull linked commits through the REST API
The issue page is for humans. When you want linked commits for a script (a release-notes generator, an external status board, a dashboard), pull them through the public REST API instead.
The endpoint is:
GET /v1/workspaces/{slug}/projects/{key}/issues/{KEY-N}/commitsIt needs the issues:read scope on your API key, which you mint in the Developer console. Results come back ordered by committed date, newest first, with keyset pagination for issues that carry a long commit history.
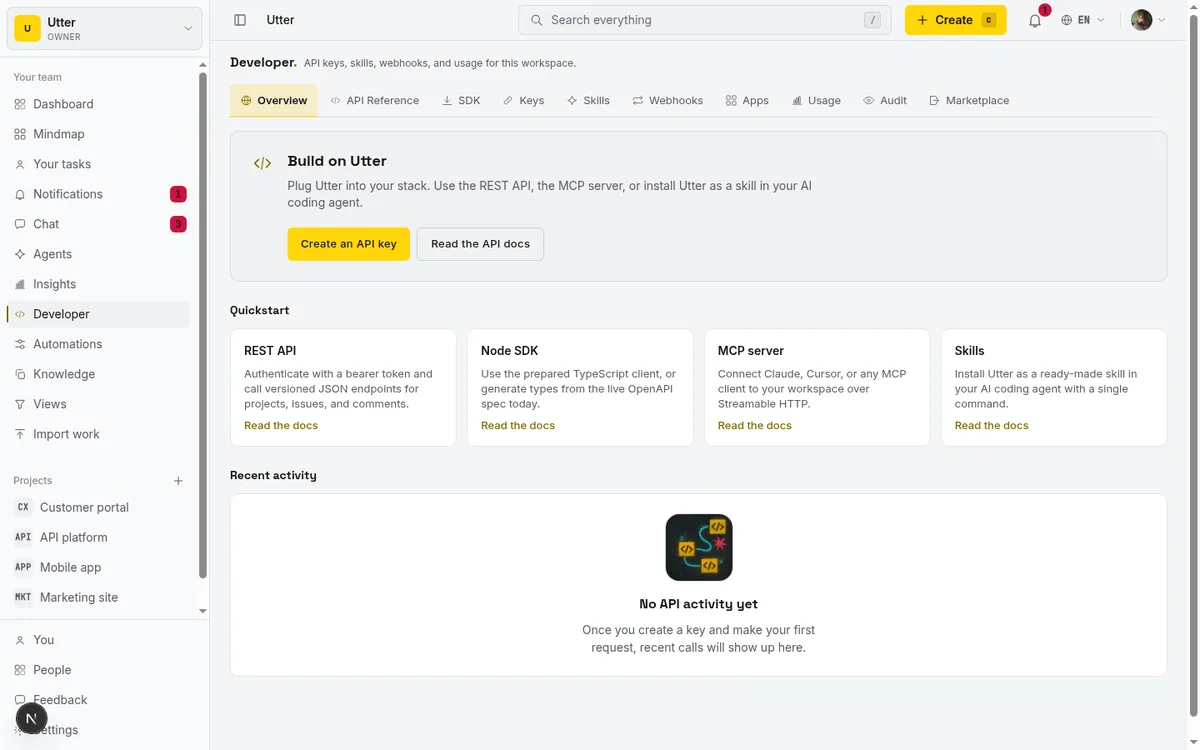
A minimal call against WEB-12 in the utter workspace looks like this. The base URL is https://utter.ae/api:
curl "https://utter.ae/api/v1/workspaces/utter/projects/WEB/issues/WEB-12/commits" \
  -H "Authorization: Bearer utp_live_your_api_key"
const res = await fetch(
"https://utter.ae/api/v1/workspaces/utter/projects/WEB/issues/WEB-12/commits",
{ headers: { Authorization: "Bearer utp_live_your_api_key" } },
);
const { data } = await res.json();
for (const c of data) {
console.log(`${c.sha.slice(0, 7)} ${c.message} (${c.repo})`);
}import requests
res = requests.get(
"https://utter.ae/api/v1/workspaces/utter/projects/WEB/issues/WEB-12/commits",
headers={"Authorization": "Bearer utp_live_your_api_key"},
)
for c in res.json()["data"]:
print(c["sha"][:7], c["message"], c["repo"])The response is the standard envelope, data plus pagination:
{
  "data": [
    {
      "id": "01890a5c-...",
      "repo": "your-org/web",
      "sha": "abc1234def5678...",
      "message": "Fix summary tab crash #WEB-42",
      "url": "https://github.com/your-org/web/commit/abc1234...",
      "author": "Sara",
      "committed_at": "2026-07-14T09:12:00.000Z"
    }
  ],
  "pagination": { "next_cursor": null }
}
You get back the same data the Linked commits section shows: SHA, message, author, commit date, repo, and the commit URL. That last field means your script can build "WEB-12 was fixed in abc1234, here is the diff" lines for a changelog without anyone opening the app, or feed a public status page that maps commits to closed tickets. Because it is the exact same underlying data, it never drifts from what a teammate sees on the issue. When next_cursor comes back non-null, pass it as the cursor on your next request to walk the rest of the history.
For the full picture of authentication, scopes, and pagination, how to use the REST API is the reference.
What does not link (read this before you file a bug)
This is the section that saves your afternoon. Every item below is a real boundary of the feature, stated plainly, so you stop expecting behavior that was never built.
Pull request references are not parsed. There is no pull_request handler in the webhook receiver, full stop. Referencing #WEB-42 in a PR title or a PR description does nothing on its own. Linking comes only from commit message text. Now, that text often arrives via a PR (merge a branch or push to it, and those commits carry their messages), so in practice PR-driven commits link fine. But it is always the commit message being read, never the PR object. If your #WEB-42 lives only in the PR body and never in any commit message, it will not link. Put the key in the commit.
Branches are not tracked. Utter reads the push's ref only far enough to notice a tag push (for the separate release feature). It does not record or show which branch a commit came from, and it does not create branch links on the issue. The issue page shows commits. Not branches, not PRs.
Only the commit message is scanned. Not the PR description, not PR comments, not some other field. Just the commit.message string. A key anywhere else is invisible to the linker.
Bare keys only work at the start. Worth repeating, because it is the most common surprise: WEB-42 with no hash links only when it is the very first thing in the message. Mid-message, you need #WEB-42. And keys must be uppercase, 2 to 6 characters. web-42 is ignored, and so is anything shorter than 2 or longer than 6 characters after the letter.
Linking fires no notification. This one shapes expectations. When a commit links to an issue, it creates a commit_refs row and a commit_linked activity entry, and that is all. The assignee is not emailed. The reporter is not pinged. There is no @mention. So do not push a commit expecting it to nudge whoever owns the ticket, because it will not. If someone needs to know, tell them, or comment on the issue and @mention them there. The notifications guide covers what actually does trigger a notification.
Release auto-ship is a different feature. If you also select the release event, a tag push or a published GitHub release can auto-ship a matching planned release in Utter (flip it to released and stamp the date, when the tag matches the version). That lives in the Releases feature. It is not commit-linking, and the two should stay separate in your head. Adding the release event changes nothing about how commit messages link to issues.
Secret scanning is a wholly separate thing. Utter runs a distinct GitHub secret-scanning partner receiver at a different endpoint. It handles leaked Utter API keys (the utp_live_ kind): if GitHub detects one of your Utter keys exposed in a public repo, it alerts that receiver, which auto-revokes the leaked key and emails the workspace owner. You do not turn it on per repo from the Integrations tab, and it does not scan your code for secrets. Do not confuse it with connecting a repo for commit links. They share the word "GitHub" and nothing else.
That is the honest edge of the feature. Inbound-only, commit-message-driven, per project, no notifications, no PR or branch awareness. Narrow on purpose, and reliable because of it.
Go open your WEB project's Integrations tab, register your repo, and put #WEB-42 in your next commit. The link will be waiting on the issue when you get there.
Frequently asked questions
How do I connect GitHub to my project management tool in Utter?
Open the project's Settings, click the Integrations tab, and register your repository as owner/name on the GitHub card. Utter shows a one-time webhook secret and the exact values (Payload URL, application/json, the secret, push event) to paste into your GitHub repo's Settings > Webhooks > Add webhook. Once saved, commits linking is live.
Why aren't my commits showing up on the issue?
Almost always one of two things. Either the webhook secret does not match (a wrong secret makes signature verification fail silently, so nothing links), or your issue reference is malformed. Check GitHub's Recent Deliveries log for a green response, and confirm the key is uppercase and either prefixed with # or the very first thing in the commit message.
Do pull request titles or descriptions link to issues?
No. There is no pull_request handler at all. Only commit message text is parsed. A #WEB-42 in a PR body links nothing on its own, though commits merged through that PR will link if the key is in their messages. Put the key in the commit.
What's the difference between #WEB-42 and a bare WEB-42 in a commit?
#WEB-42 (with the hash) links anywhere in the message. A bare WEB-42 links only when it is the very first thing in the message, followed by a colon, dash, space, or line end. Mid-message without a hash, it is ignored. When in doubt, use the # form; it always works.
I lost the webhook secret. How do I get it back?
You cannot. The secret is shown exactly once and is stored encrypted at rest, so there is no reveal or rotate button. Revoke the repository on the Integrations tab and register it again; that mints a fresh secret, which you then paste into the GitHub webhook's secret field.
Does linking a commit notify the assignee?
No. Linking creates a commit_refs row and a commit_linked activity entry, and nothing else. There is no email, no @mention, no push notification. If someone needs to know a fix landed, comment on the issue and mention them directly.
Can I connect one repo to more than one project?
Yes. Connection is per project, and a monorepo can be registered against several projects (WEB, API, MOBILE, and so on). Each project gets its own integration record and its own webhook secret, and a commit only links to issues in the project whose integration received the push.
How do I read linked commits programmatically?
Call GET /v1/workspaces/{slug}/projects/{key}/issues/{KEY-N}/commits with the issues:read scope. It returns the same data the issue page shows (SHA, message, author, date, repo, commit URL), ordered newest first with keyset pagination, so it is the right tool for changelogs or issues with more than the 50 rows shown in the UI.
Related reading
How to use webhooks
Set up outbound webhooks in Utter: create one, verify the HMAC signature (sha256-of-secret gotcha), handle at-most-once delivery, and pipe board events to Slack.
July 15, 2026 · 16 min read
How to connect an ai agent
Connect an AI agent to a project management tool in Utter: name it, mint a scoped key, wire up MCP, assign a ticket, and watch its sessions, step by step.
July 15, 2026 · 15 min read
Keep team chat next to your issues, not in another app
The case for project management with built-in chat: why splitting discussion from the tracker loses the thread, and how linking chat to issues fixes it.
July 9, 2026 · 6 min read
How to create your first workspace
Getting started with a project management tool: sign in with a magic link (no password), create your first workspace and slug, and set a permanent project key.
July 15, 2026 · 15 min read
A GitHub Issues alternative for when projects outgrow a repo
GitHub Issues alternative for teams that outgrew Issues but keep GitHub for code: real statuses, ranked backlog, burndown, commit linking, and free AI-agent seats.
July 16, 2026 · 13 min read
How to use team chat
A practical guide to team chat in a project management tool: channels, DMs, threads, @mentions, file attachments, and the honest limits, all next to your issues.
July 15, 2026 · 16 min read
How to use the rest api
Get an Utter API key and use the project management REST API to list, create, and update issues safely, with scopes, idempotency keys, and rate limits explained.
July 15, 2026 · 16 min read
How to set up automations
Set up project management automation rules in Utter: the when/if/then model, six triggers, conditions, nine actions, run history, plan caps, and real limits.
July 15, 2026 · 18 min read
How to use AI agents in Utter: connect them, assign work, and follow their sessions
A start-to-finish walkthrough: connect an agent, scope its key, assign it issues, and watch its sessions, without giving up control of the board.
July 15, 2026 · 11 min read
Chat with your AI agents, then put them in a workflow
Utter lets you DM an AI agent or @mention it in a channel, watch it work, and connect agents and people on a canvas so a ticket routes itself through triage, build, and review.
July 17, 2026 · 7 min read
Add a comment
Start the conversation.